The Membership system is suitable for stores that want to categorize their members into different levels. Membership types must be created via the ZORT website. However, the addition of members can be done through either the ZORT website or the ZORT POS system.
Note: This feature is not officially launched yet. If you would like to use it, you can try out the “Membership (Beta)” add-on feature.
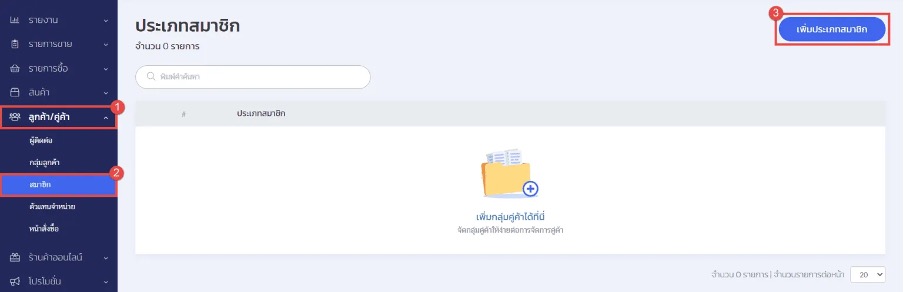
How to Create Membership Types on ZORT
- Go to the “Contact” page.
- Select “Members.”
- Click “Add Membership” to create a new membership type.
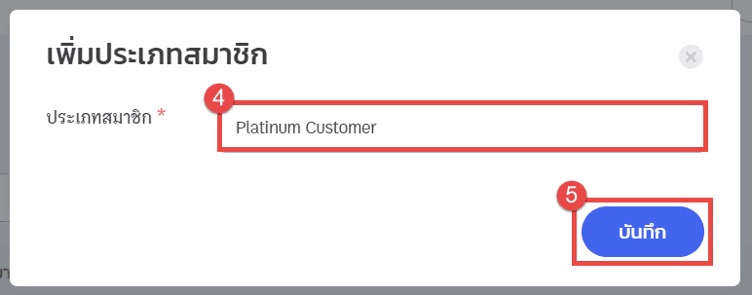
- Enter the desired membership type name.
- Click “Save” to save the membership data.
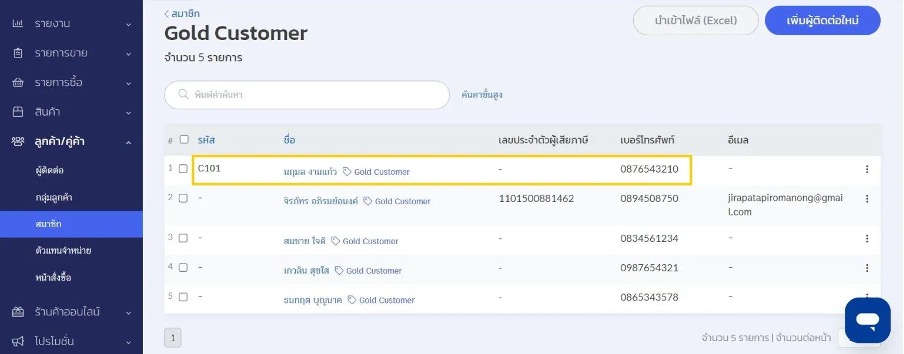
How to Add Members to a Membership Type
You can add members in 3 ways as follows:
- Add Members in the “Members” Feature
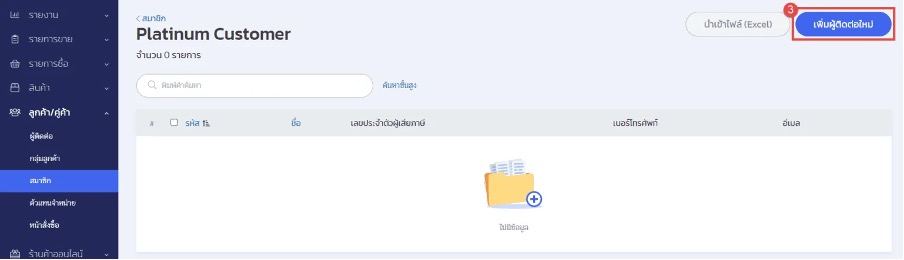
1.1 Go to the “Members” feature.
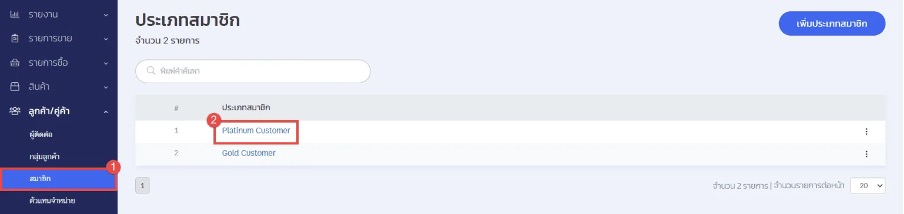
1.2 Click on the name of the membership type.
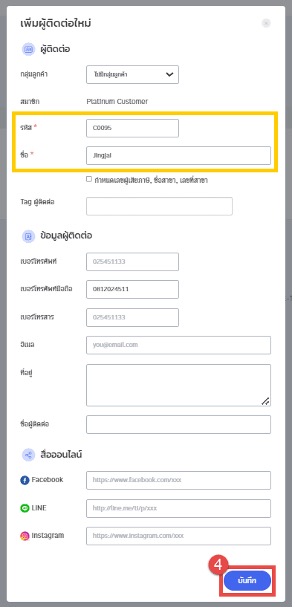
1.3 Click “Add New Contact.”
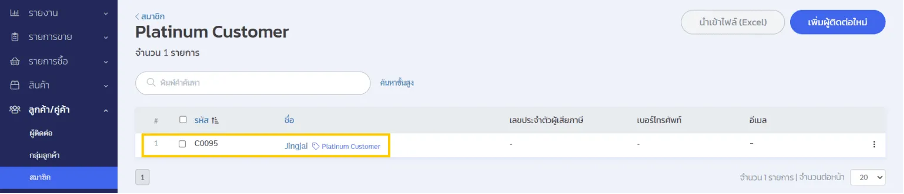
1.4 Enter the member’s details completely. Fields marked with an asterisk (*) are required. Then click “Save” to save the member data. The member’s name will appear in the selected membership type.
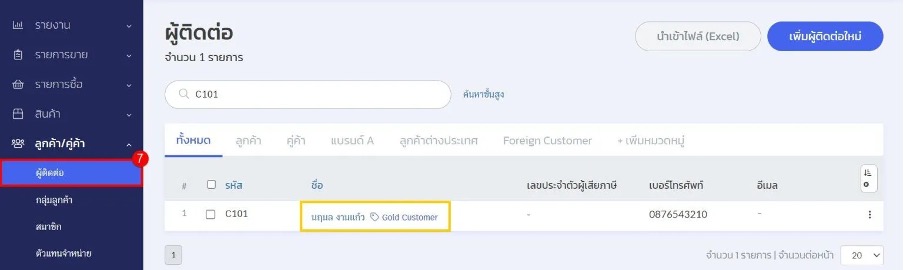
- Add Members from the “Contacts” Feature
2.1 Go to the “Contacts” page.
2.2 Select the names you want to add to the membership type (multiple selections are allowed).
2.3 Click “Orders.”
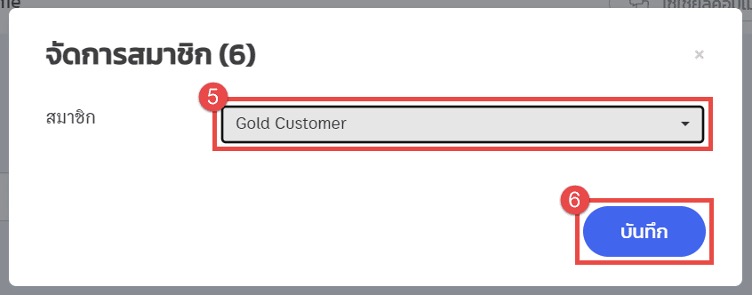
2.4 Select “Manage Members.”
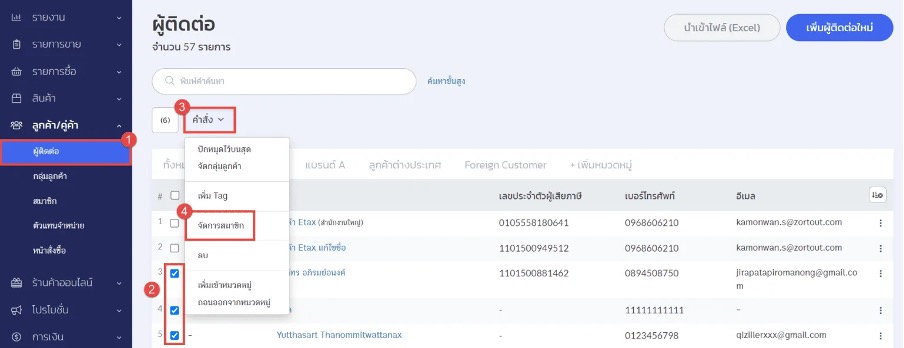
2.5 Choose the desired “Membership Type.”
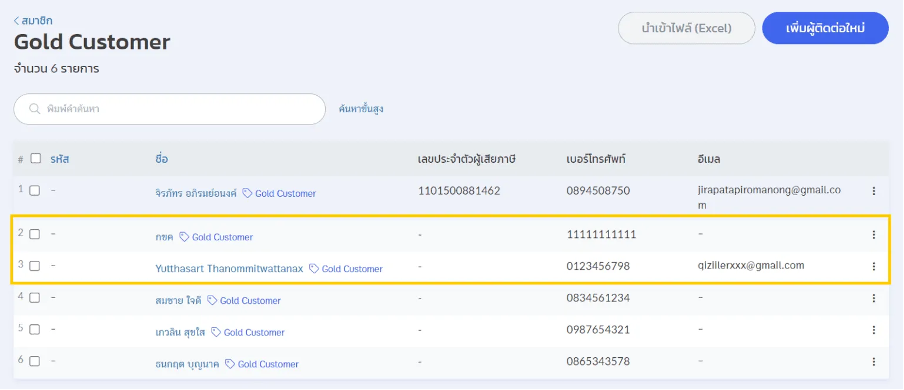
2.6 Click “Save.” The selected customer will now be in the desired membership group.
- Add Members on the POS Application via Sales Transactions
3.1 Go to the “Members” feature.
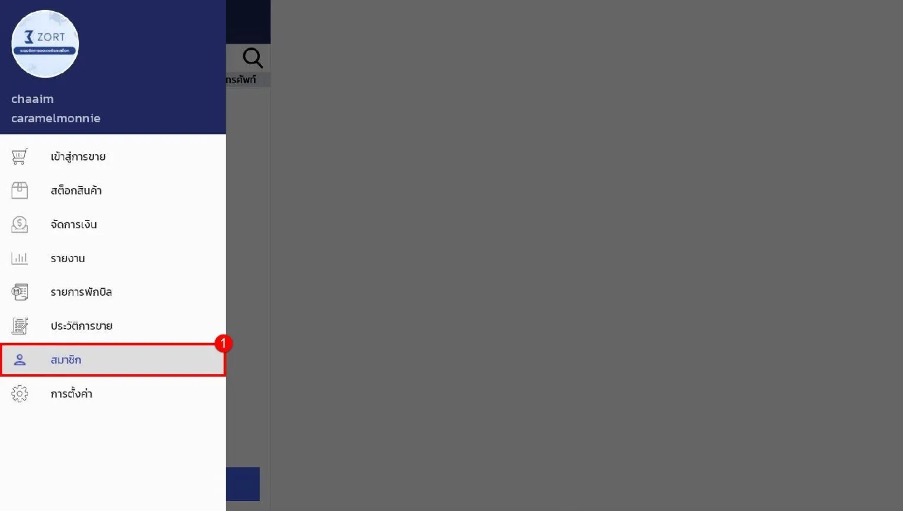
3.2 Click “Add Member.”
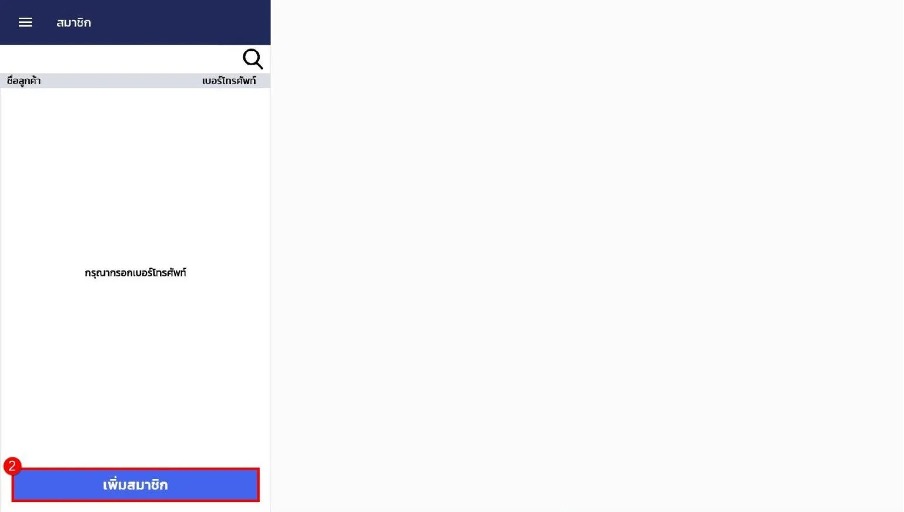
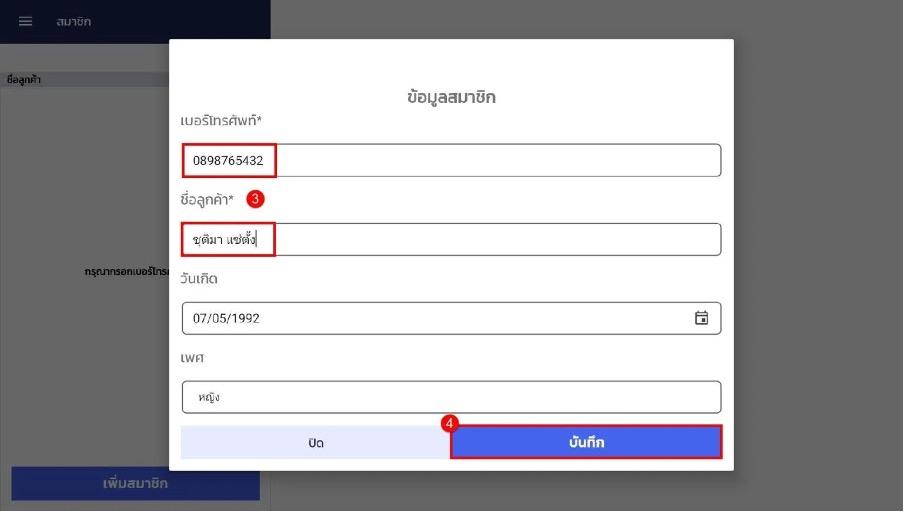
3.3 Fill in the required information, especially fields marked with an asterisk (*).
3.4 Click “Save.” Afterward, the member’s information will be displayed in the ZORT system.
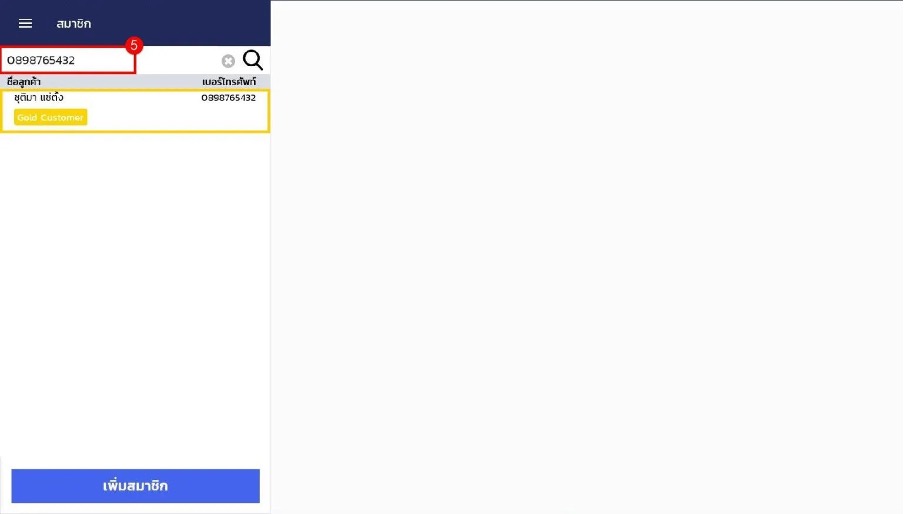
3.5 You can also search for members already in the system on the POS.
For stores that want to use the membership system on POS, follow these steps:
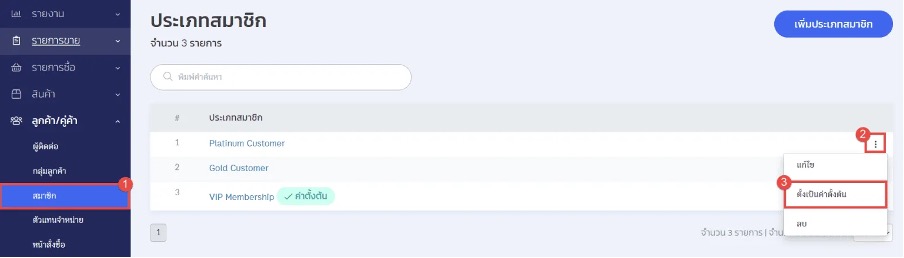
- Go to the “Members” section.
- Click the three-dot icon behind the desired membership type.
- Select “Set as Default.”
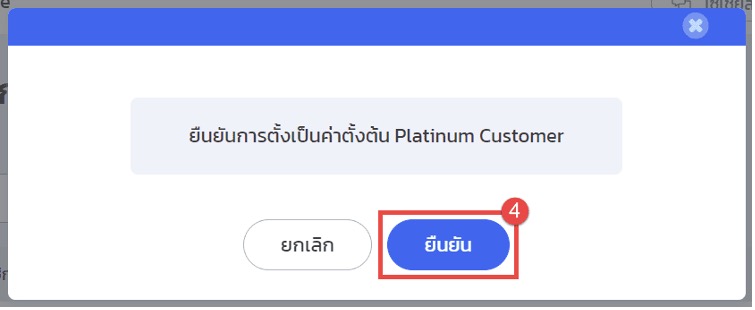
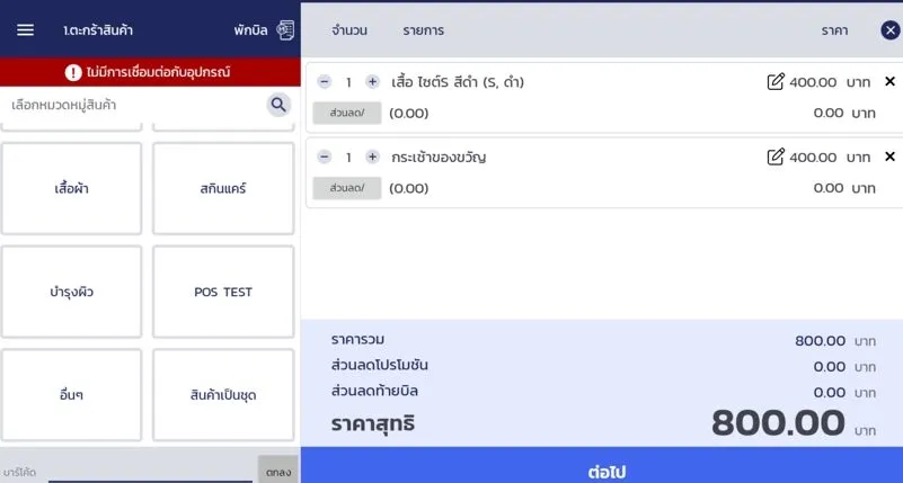
- Click “Confirm.” The system will display “Default” next to the selected membership type. Once the setting is complete, go to the POS application to create sales transactions as usual. (Sales transaction creation guide via POS: https://zortout.com/docs/pos-tablet)
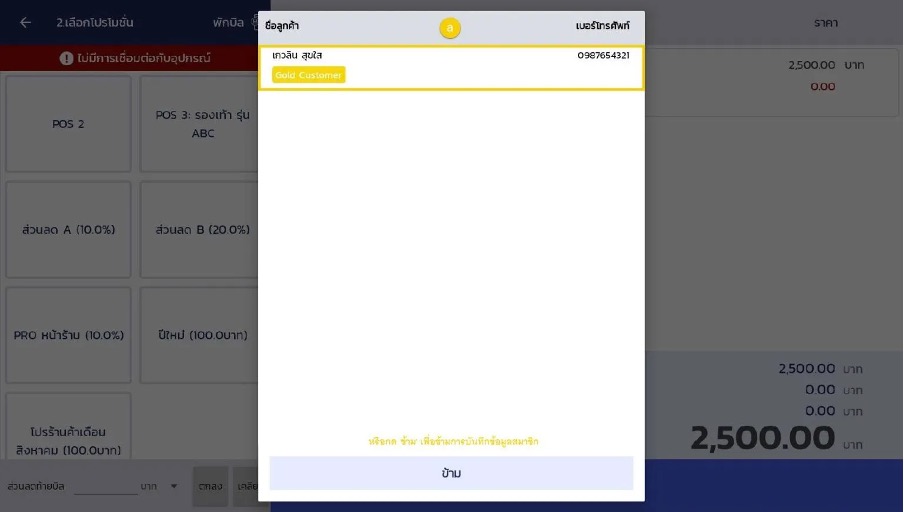
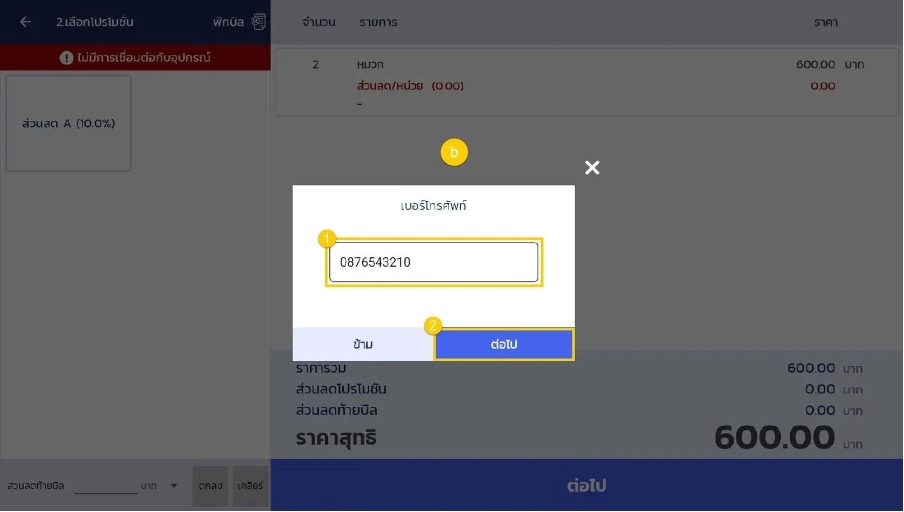
- In the sales transaction screen, a pop-up will appear asking for the customer’s phone number to add.
- Click “Next.”
a. For existing customers (customer data already in the system): Click the customer’s name, and the system will return to the sales transaction screen.
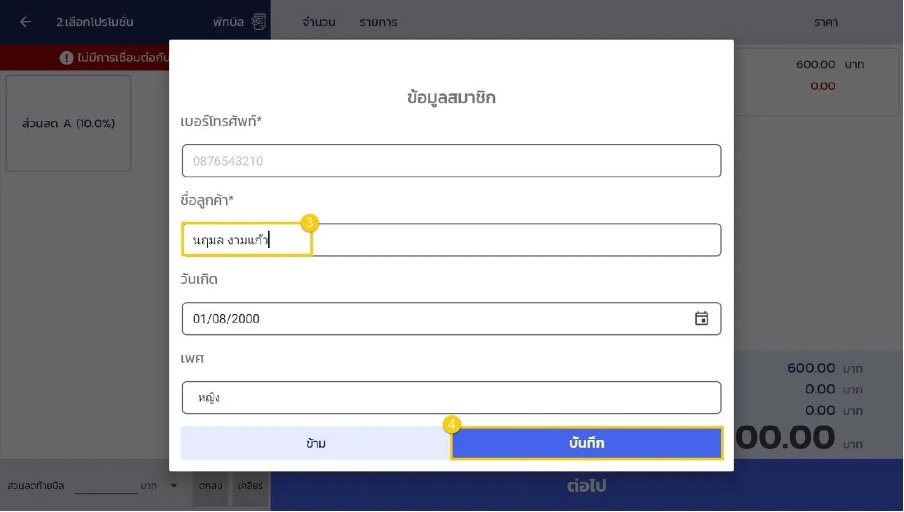
b.For new customers (customer data not in the system): The system will prompt for member information. You must fill in all required fields marked with an asterisk (*), then click “Save.”
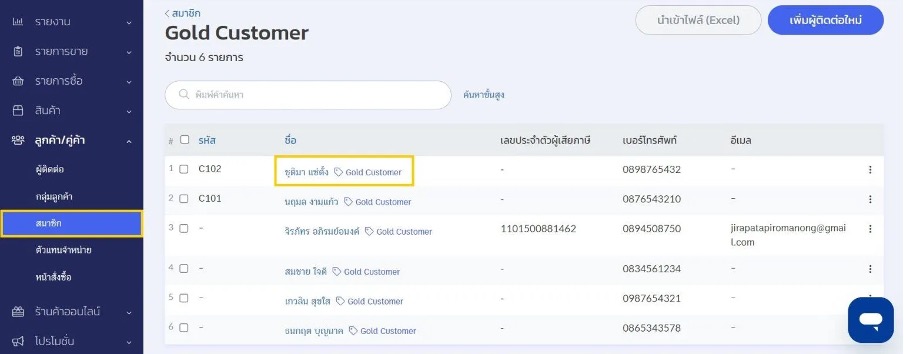
- When the sales transaction is created via the POS application and entered into the ZORT system, the customer’s data will appear under the membership type set as default. When viewing customer data in the “Contacts” feature, the system will display the membership tag next to their name.
With these steps, you can start using the ZORT x POS Membership add-on feature.
Interested in a Complete Store Management System?
For more information, contact us:
Email: support@zortout.com
Phone: 02-026-6423
Line: @zort


