Customers may return products due to incorrect shipments, dissatisfaction, or defects. Follow these steps to process a product return:
How to Process Product Returns from Customers
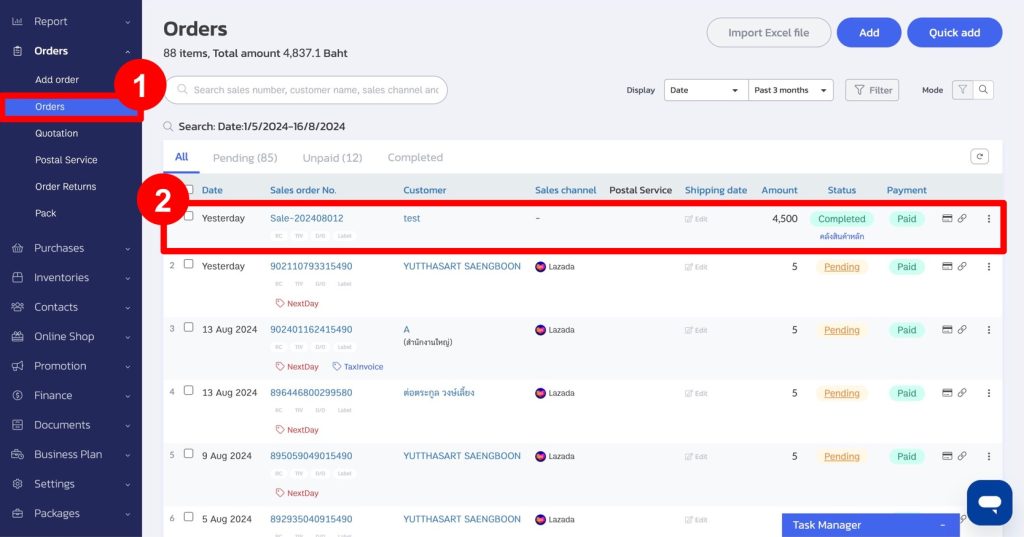
1. Go to the “Orders” menu and select “Orders.”
2. Choose the sales order for which the customer wants to return products.
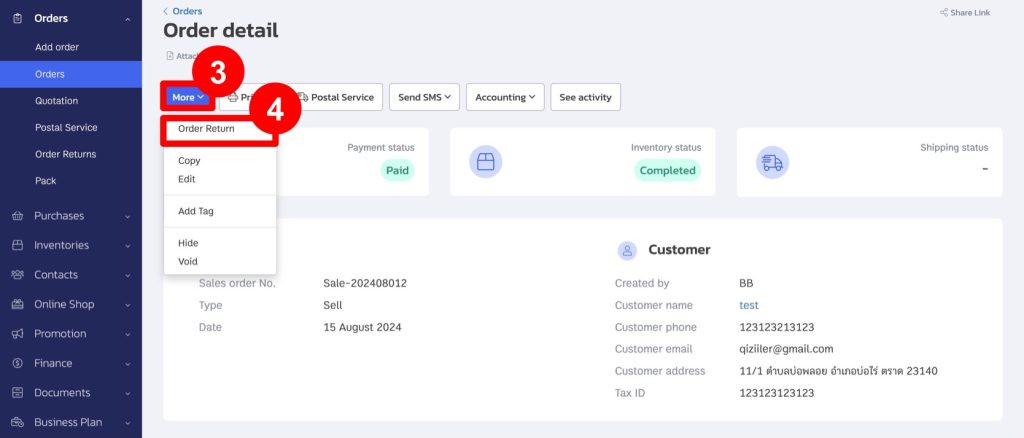
3. Go to “More.”
4. Click “Order Return.”
5. Select the products to be returned and the quantity to be returned.
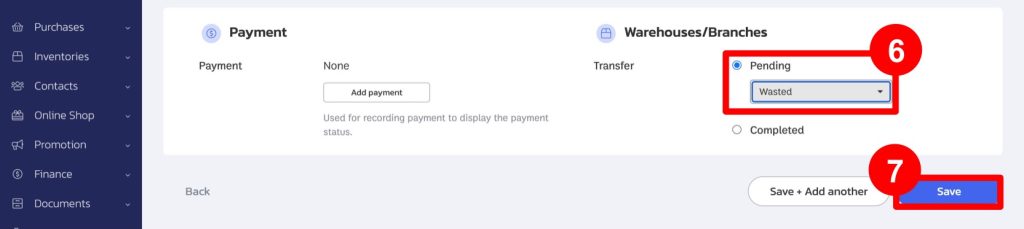
6. Click “Pending” and select “Wasted Warehouse” or the desired warehouse.
7. Click “Save.”
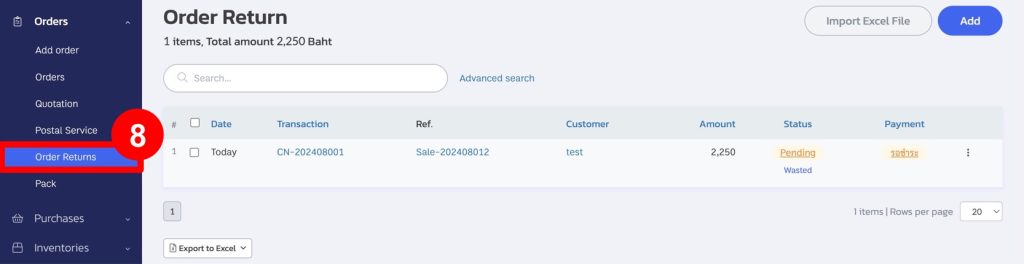
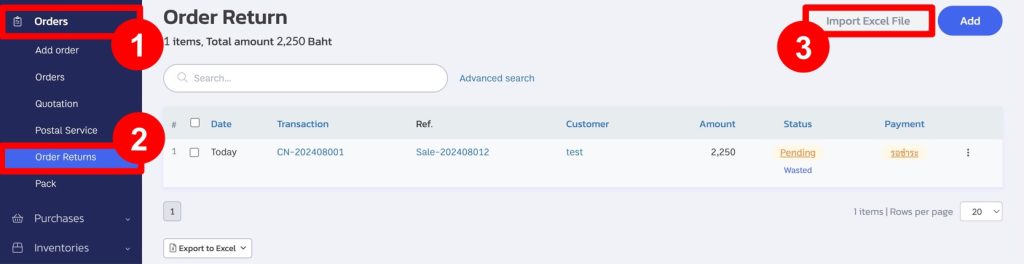
8. After saving the return transaction, you can view it by going to the “Orders” menu and then go to “Order Returns.”
How to Create a Return Order Using Excel
1. Go to the “Orders” menu.
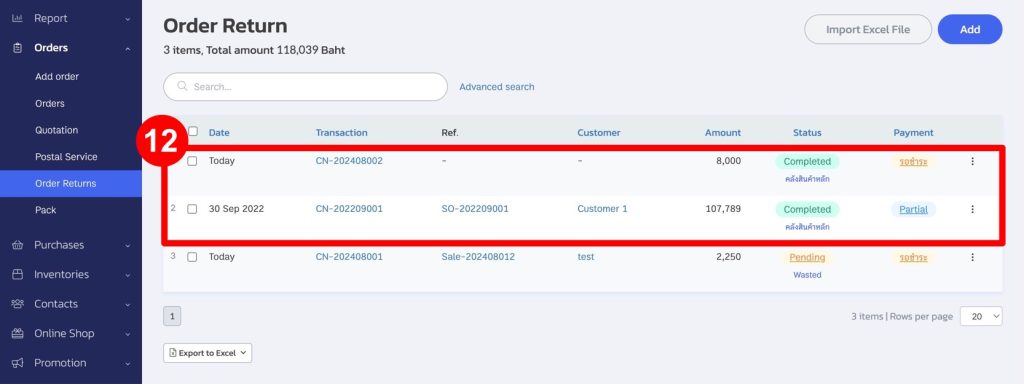
2. Select “Order Returns.”
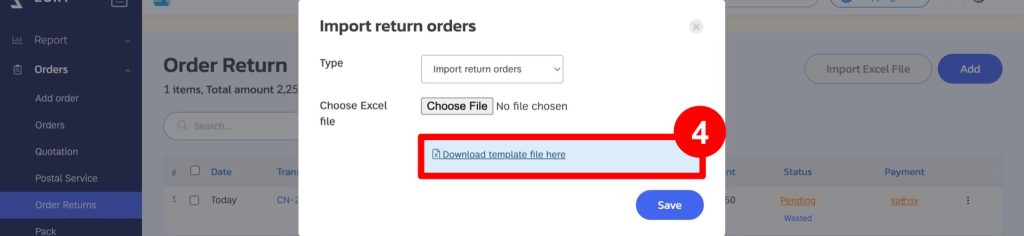
3. Click the “Import Excel File” button.
4. If you need a template for entering return order information, click “Download Template File Here” to download the Excel template.
5. Enter the details in the Excel template as follows:
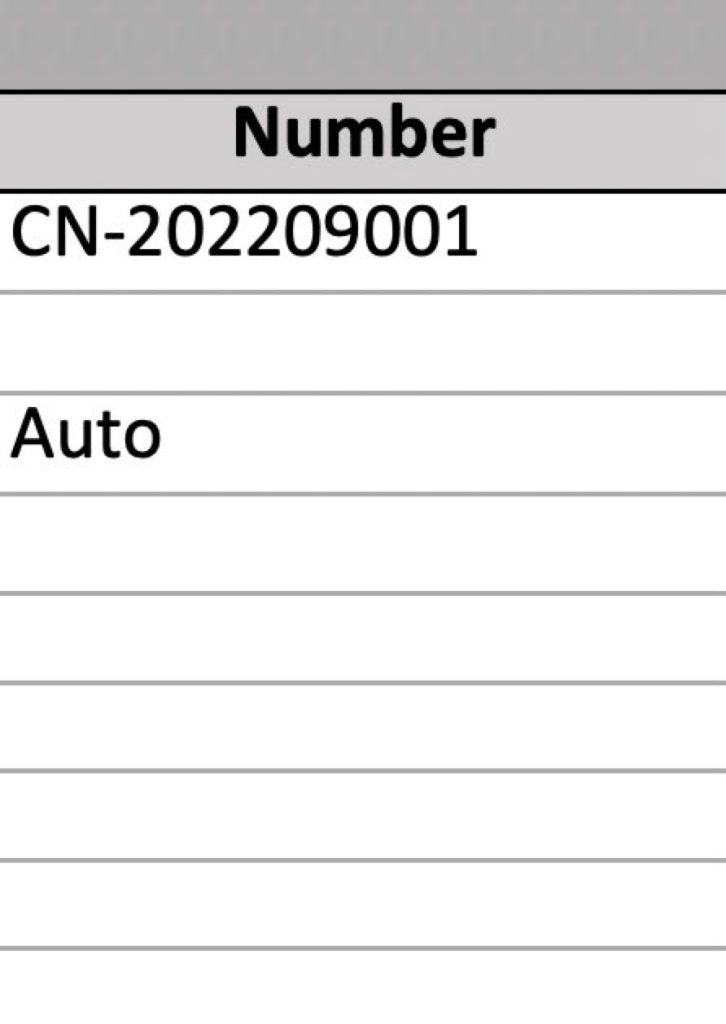
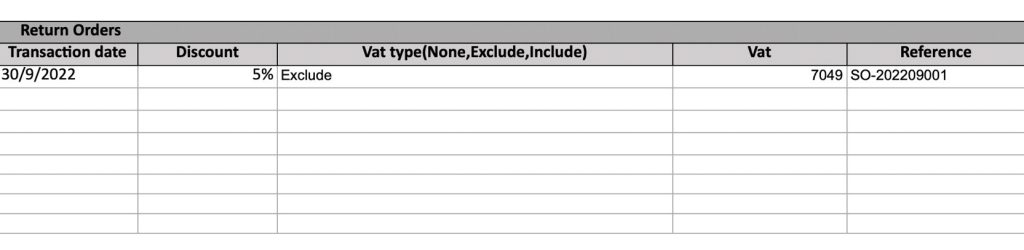
A. Order Number (required): Enter the return order number. You can specify a number or use “Auto” to let the system generate it.
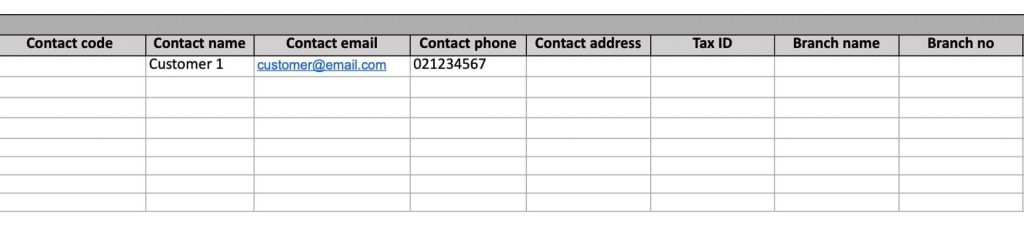
B. Customer/Vendor Information (optional): Enter customer or vendor details.
C. Transaction Date (optional): Enter the return transaction date. If left blank, the system will use the current date.
D. Discount (optional): Enter the total discount or final bill discount in currency or percentage.
E. VAT Type (None, Separate, Included) (optional): Specify the VAT type for the return order.
F. VAT Amount (optional): Enter the VAT amount for the return order. If left blank, the system will calculate it.
G. Reference (optional): Enter reference information or the sales order number being returned. If the sales order number matches an existing one in the system, it will be referenced.
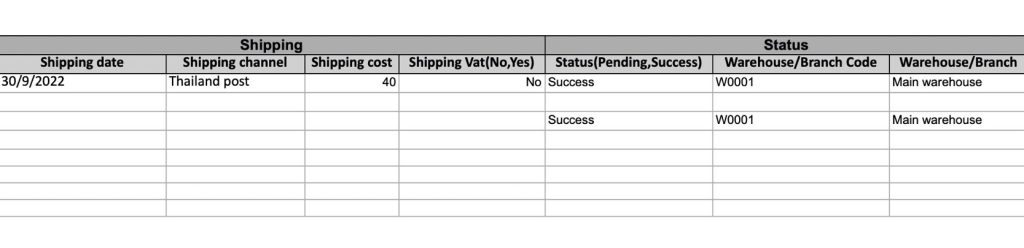
H. shipping Date and Shipping Channel optional): Enter the delivery date and method for the returned items.
I. Shipping Cost and Shipping VAT (optional): Enter the shipping cost and tax. If left blank, the system will assume no tax.
J. Status (Pending, Completed) (optional): Enter the return order status. If the product is not yet returned, use “Pending Transfer.”
K. Warehouse/Branch Code and Name (optional): Enter the warehouse code and name. You can check the warehouse information in the “Products” menu under “Warehouse/Branch.”
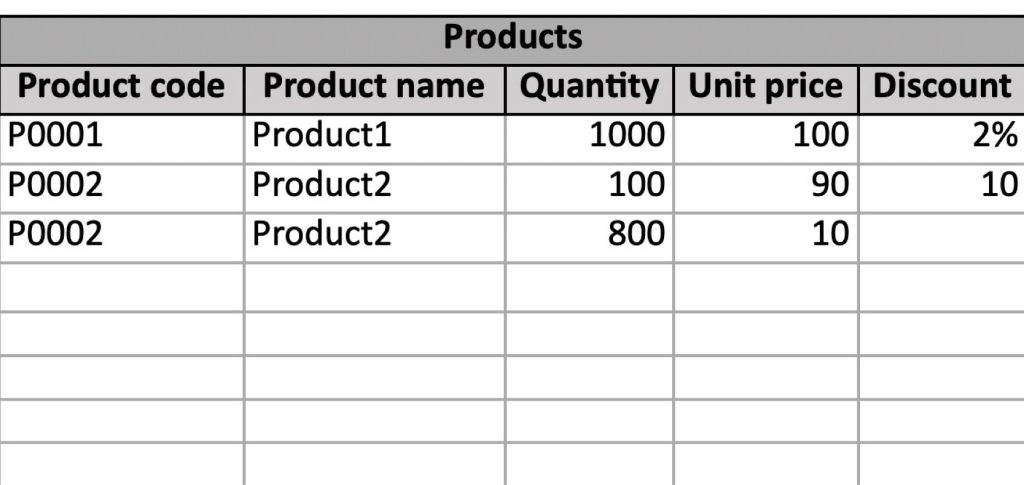
M. Product Information: Enter the product code (required), product name (required), quantity (required), unit price (optional), and unit discount (optional) for the returned items.
6. Once you have completed the Excel template, save the file.
7. To import the Excel file into the system, go to the “Sales Orders” menu.
8. Select “Product Returns.”
9. Click the “Import File (Excel)” button.
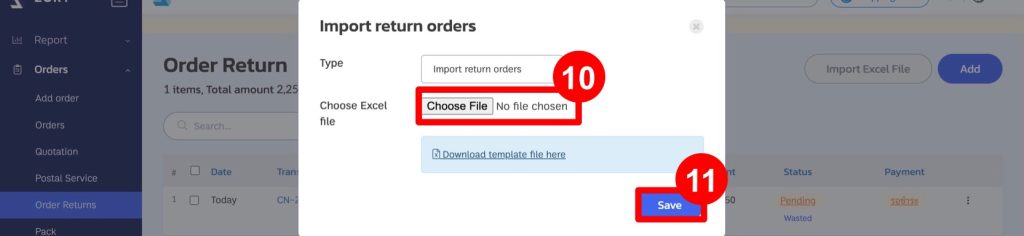
10. Click “Choose File” and select the saved Excel file.
11. Click “Save.”
12. The system will create the return order based on the imported file.
If you are interested in utilizing our comprehensive store management system,
we encourage you to reach out for further information.
Please do not hesitate to contact us at:
Phone: 02-026-6423
Email: support@zortout.com
LINE: @zort


