The Verify Slip system is designed to automatically verify the authenticity of payment slips by checking if the amount matches the balance in the account and the amount specified on the slip.
1. Payment Chanel Settings
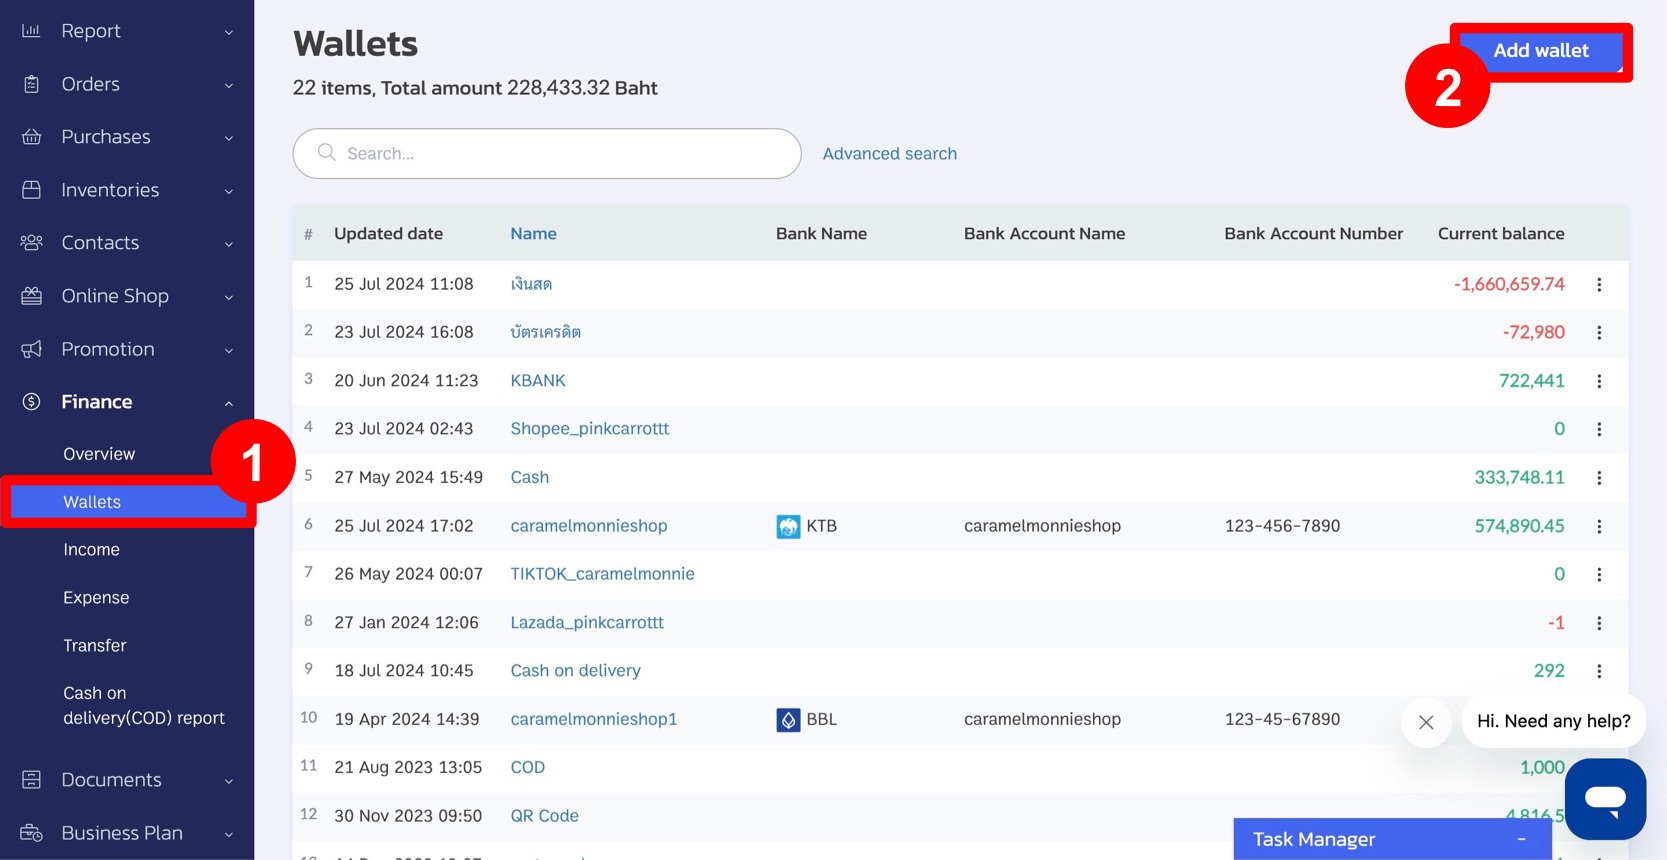
If the store does not have a wallet or is setting up a wallet for the first time:
1. Go to the “Finance” menu, and select the “Wallet” section.
2. Click “Add Wallet”.
3. Fill out the form with the following details:
A. Name: Enter the wallet name that will be displayed when selecting the payment method. You can use the bank name + account number + account holder’s name.
B. Type: Select “Bank Account” (only bank accounts are supported).
C. Bank Name: Choose the bank you want to use.
D. Book Bank Number: Enter the store’s bank account number (required).
E. Book Bank Name: Enter the name associated with the bank account.
F. Initial Balance: Enter the initial balance you want to record in the ZORT system.
G. Show in Transaction Page: Choose whether the wallet should be displayed during payment on the sales page.
H. Show in Purchase Page and Order Pages: Choose whether the wallet should be displayed when sending payment links to customers, on the Purchase page, or the order page.
Note:
1. The Verify Slip system requires selecting a bank account, as it does not support PromptPay.
2. When creating a wallet with a bank account, you must enter the account details every time. If omitted, the system cannot verify slips.
If the store already has a wallet
If the store already has payment methods and wants to use one for Verify Slip, the user must update the account details by adding the bank account number. Follow these steps:
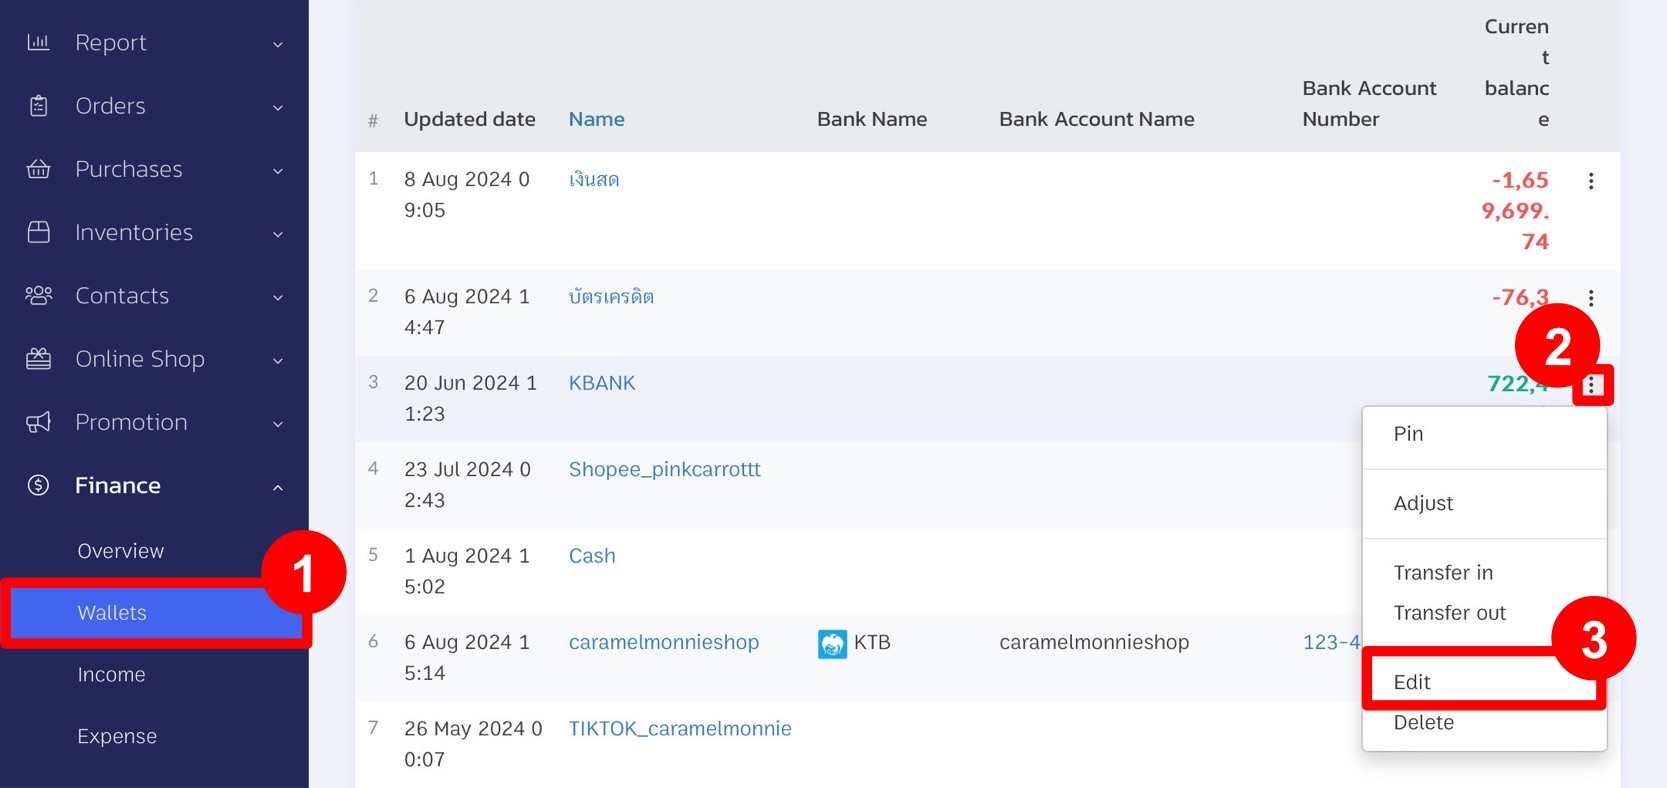
1. Go to the “Finance” menu, and select the “Wallet” section.
2. Click the three dots next to the existing wallet you want to use.
3. Select “Edit”.
4. Complete the details and click “Save”.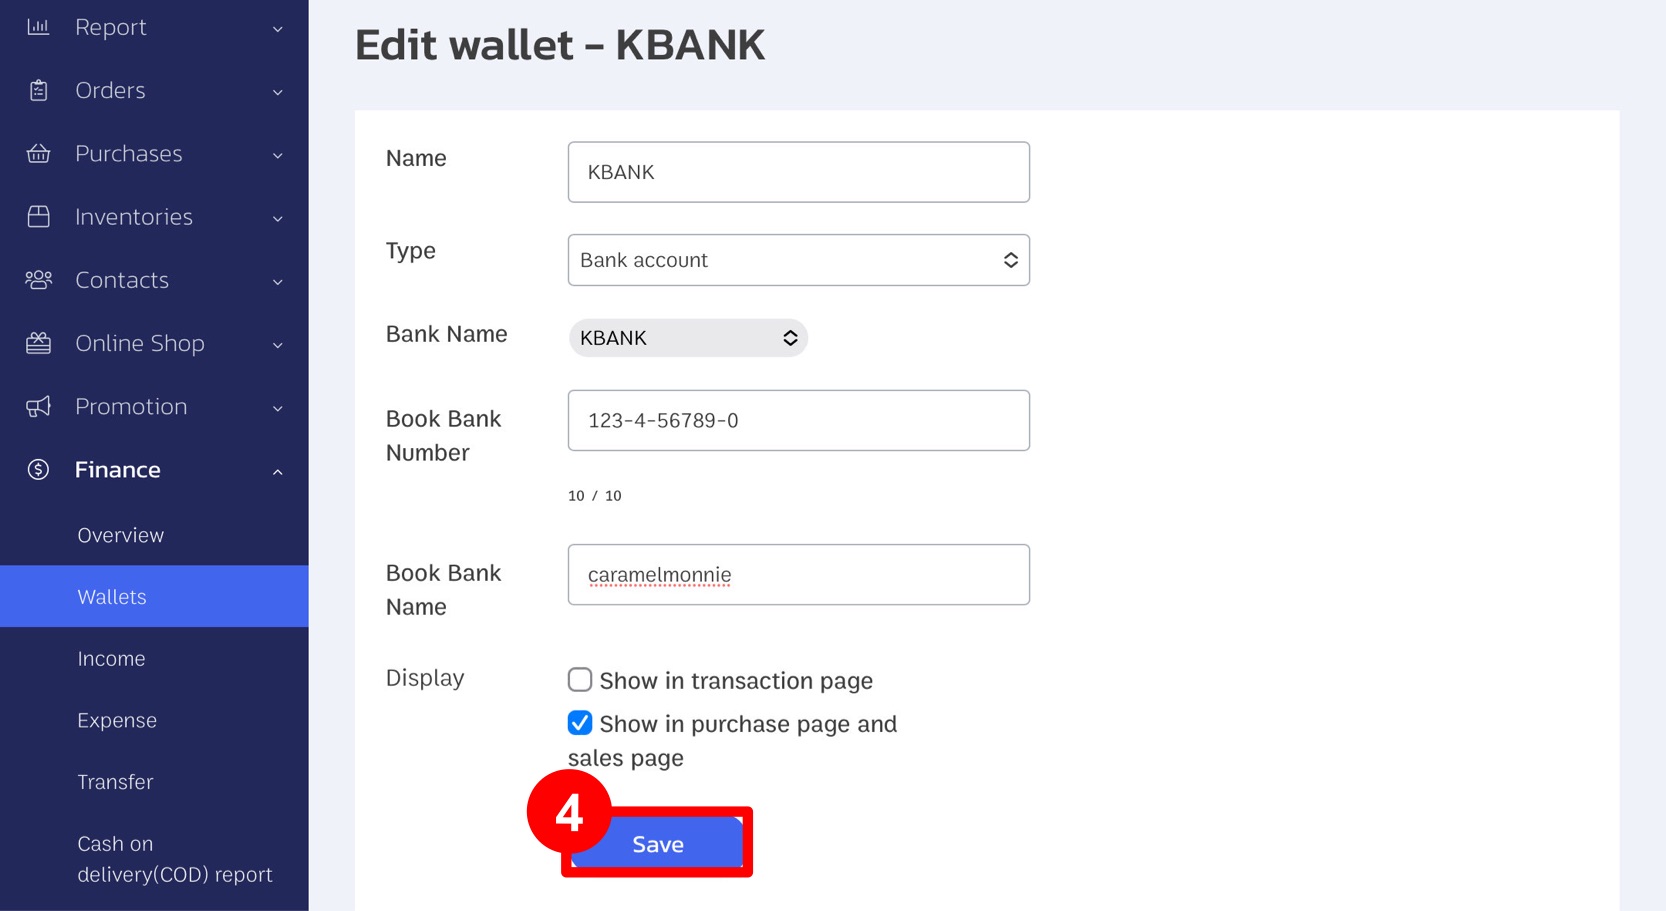
2. Topup Credit and Purchasing ZORT Verify Slip Packages
Verify Slip usage is billed at 1 credit per slip verification. To purchase packages and add credits, follow these steps:
1. Go to the “Packages” menu, and select the “Verify Slip” section.
2. Click the “Topup Verify Slip Credit” button.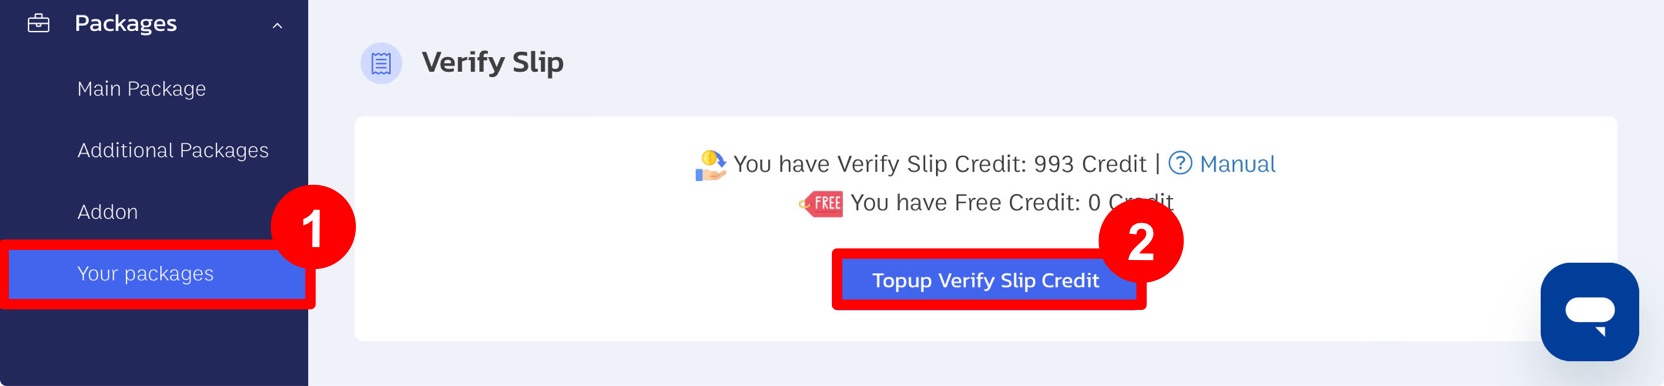
3. Select the package.
4. The selected package will appear in the cart in the upper right corner. Click “Checkout”.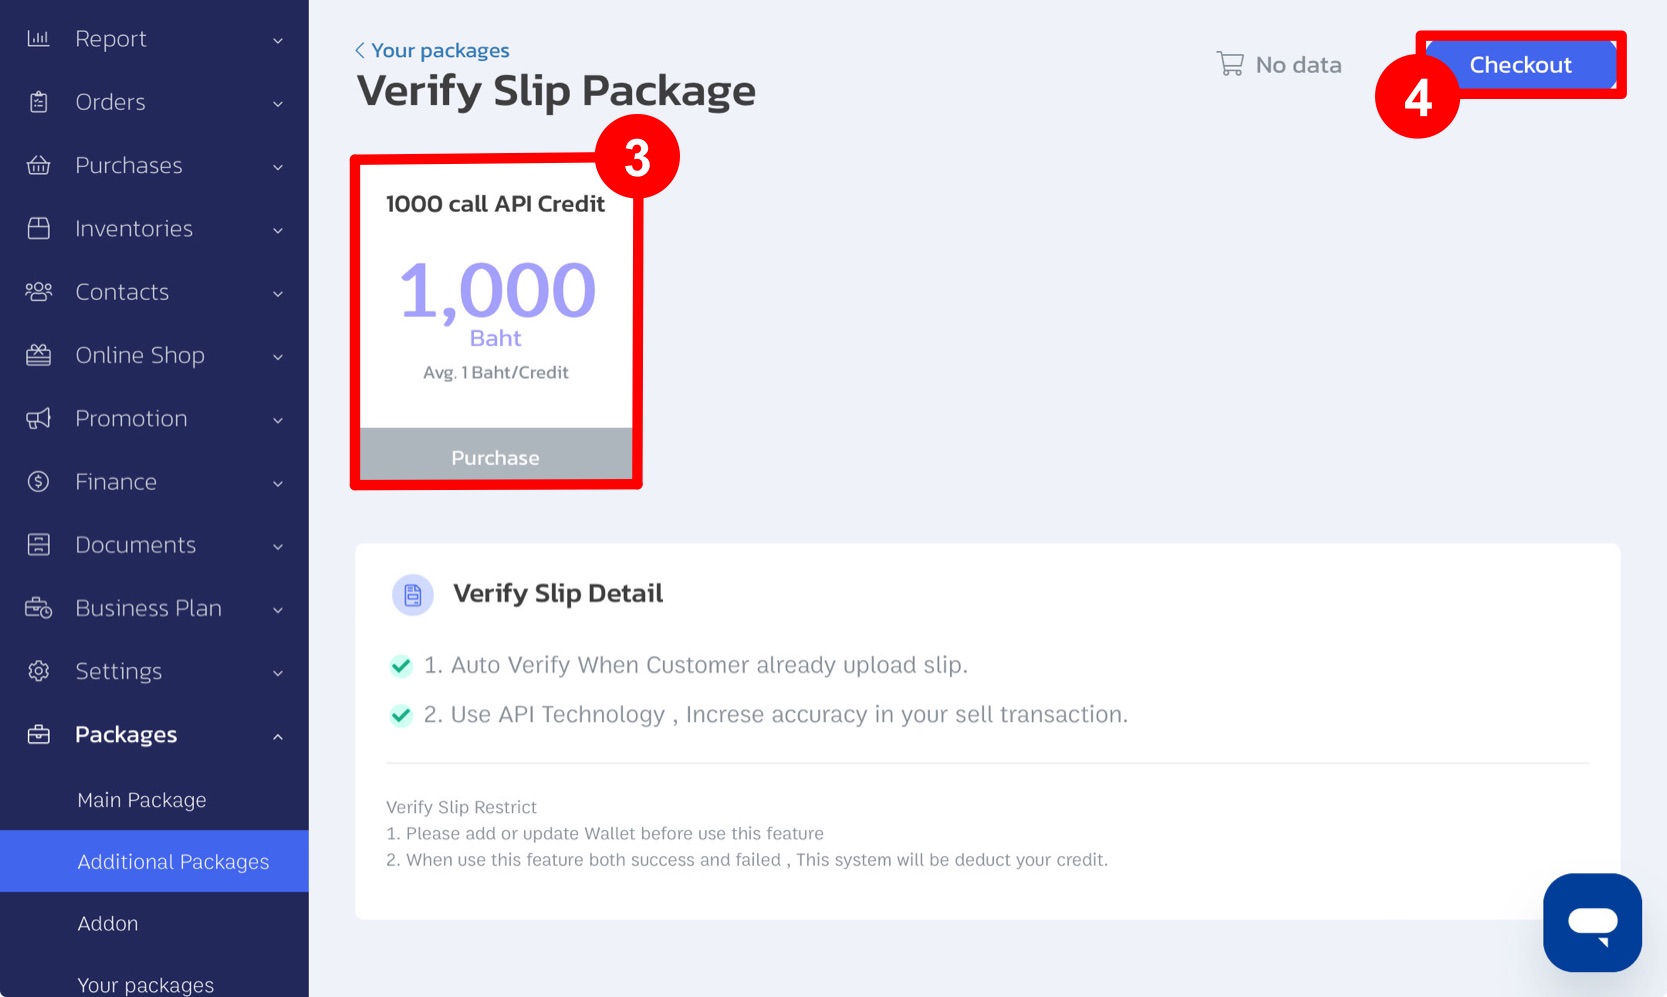
5. Choose your preferred payment method and click “Continue” to pay for the package. If you need a tax invoice, select the invoice option and complete the company details.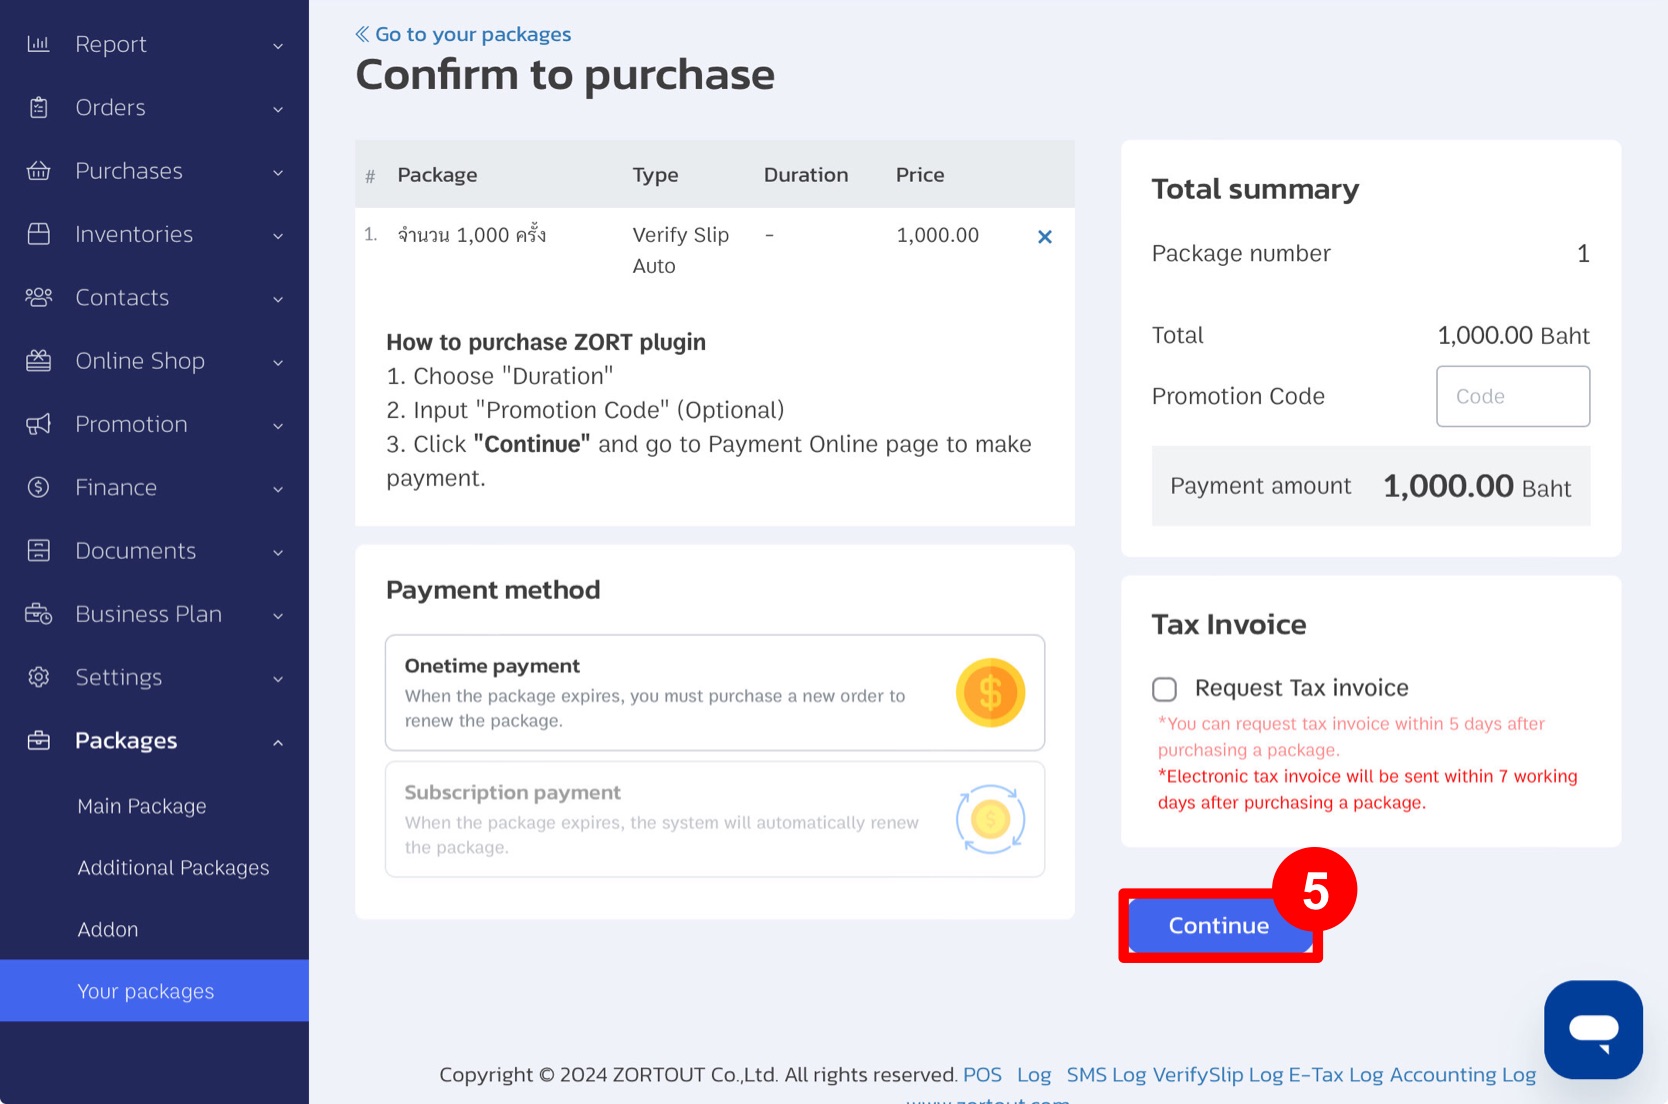
Once you have configured the payment method and added credits, the system will automatically verify slips attached to customer orders.
3. Creating Sales and Sending Payment Links
1. Start by creating a sales order. Go to the “Sales” menu, click “Create Sales Order”, and fill in the required details.
2. Click “Save Order”.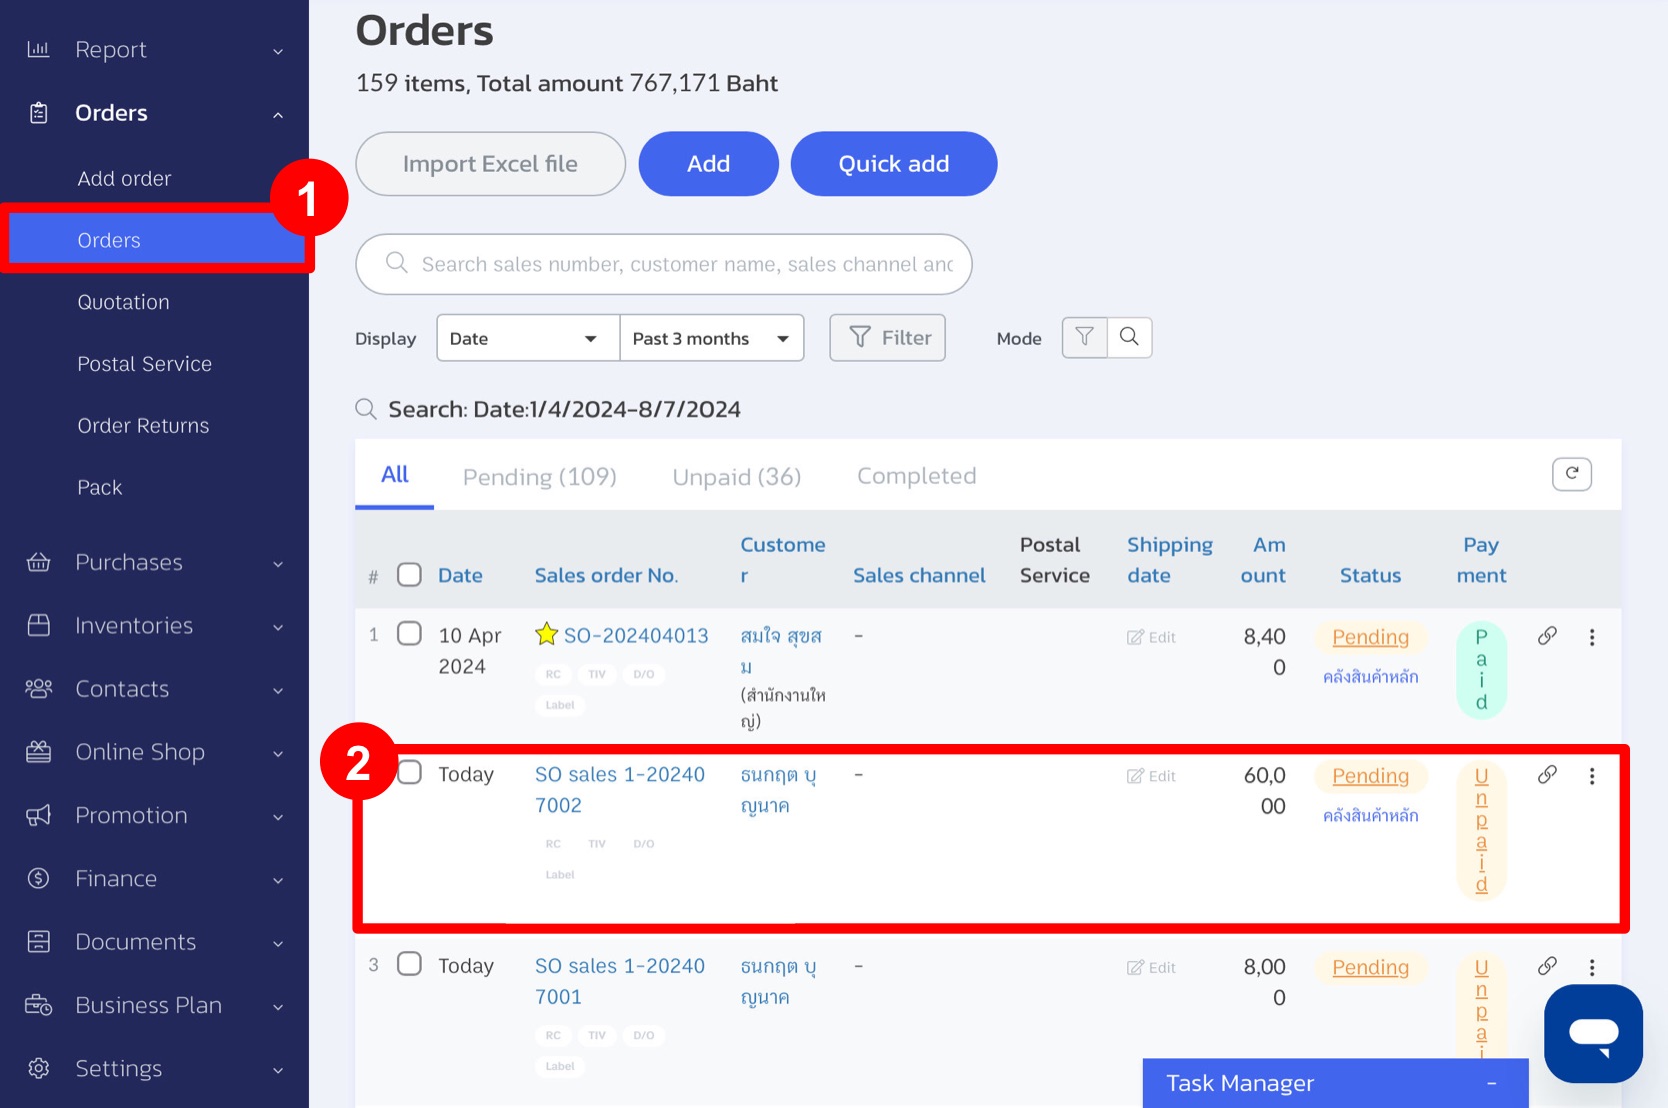
3. The system will navigate to the sales order details page. Click the “Share Link” button in the upper right corner.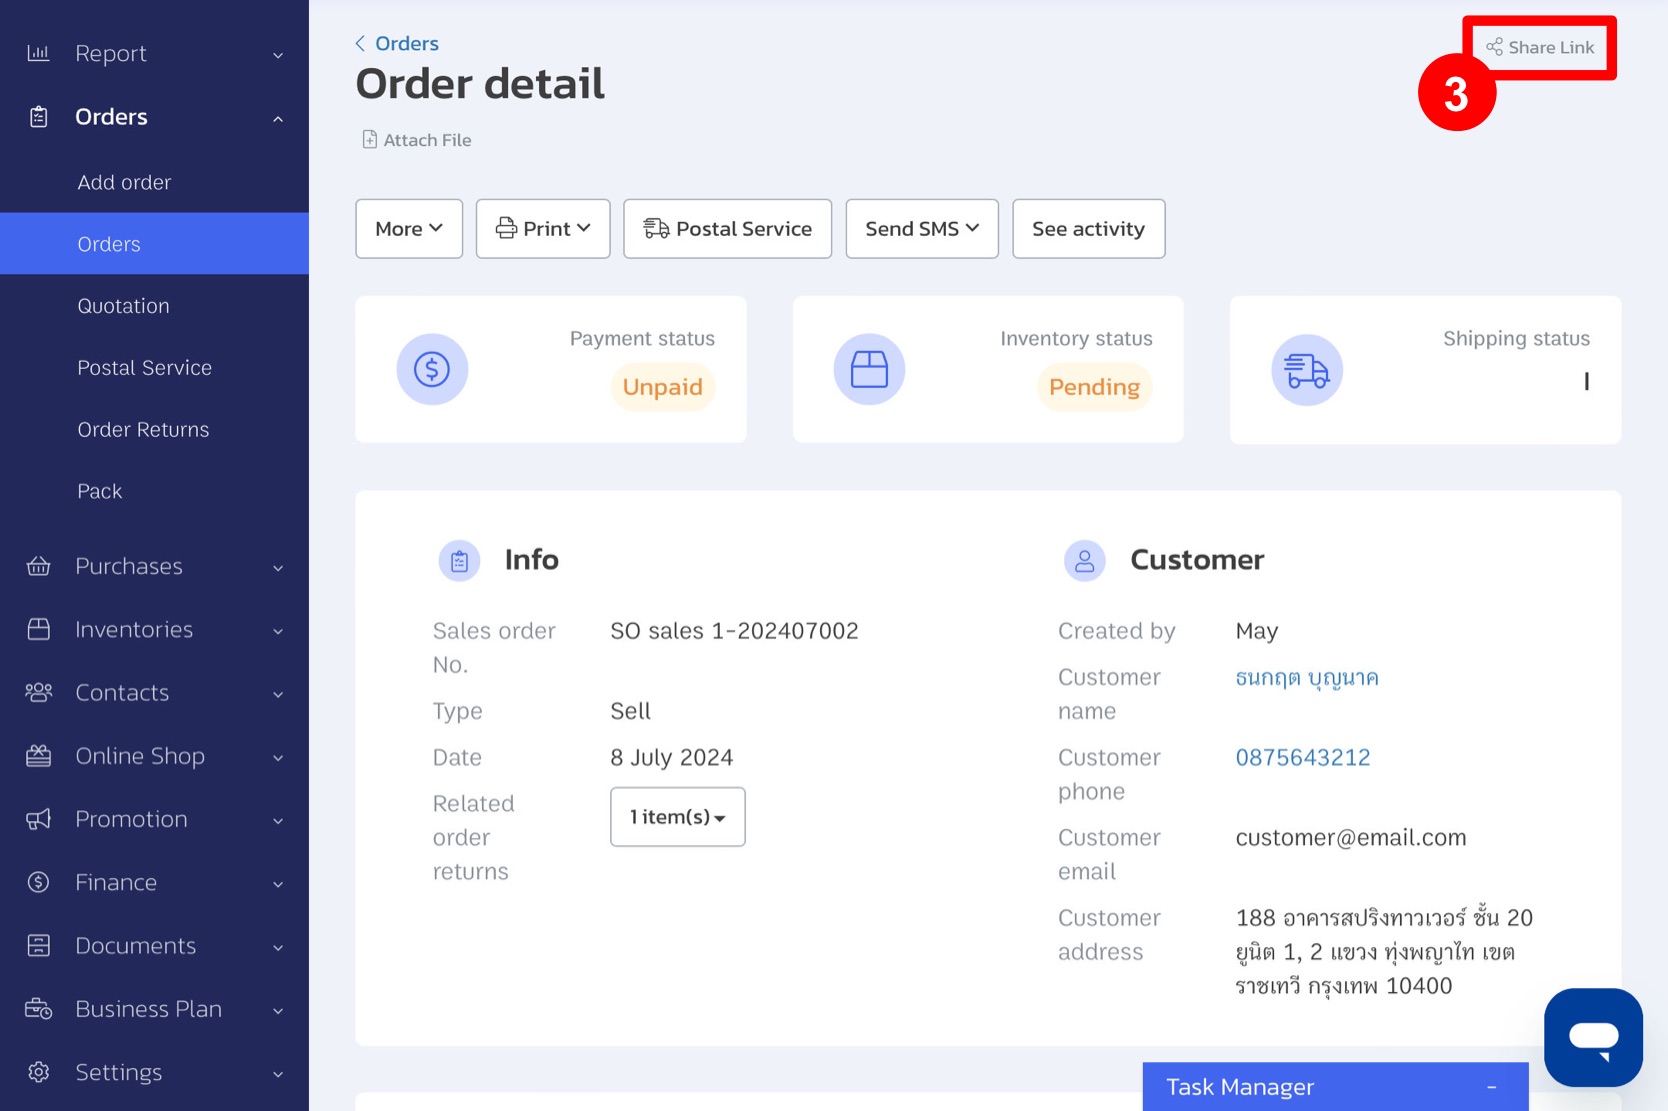
4. Click “Copy Link” to send to customers for payment.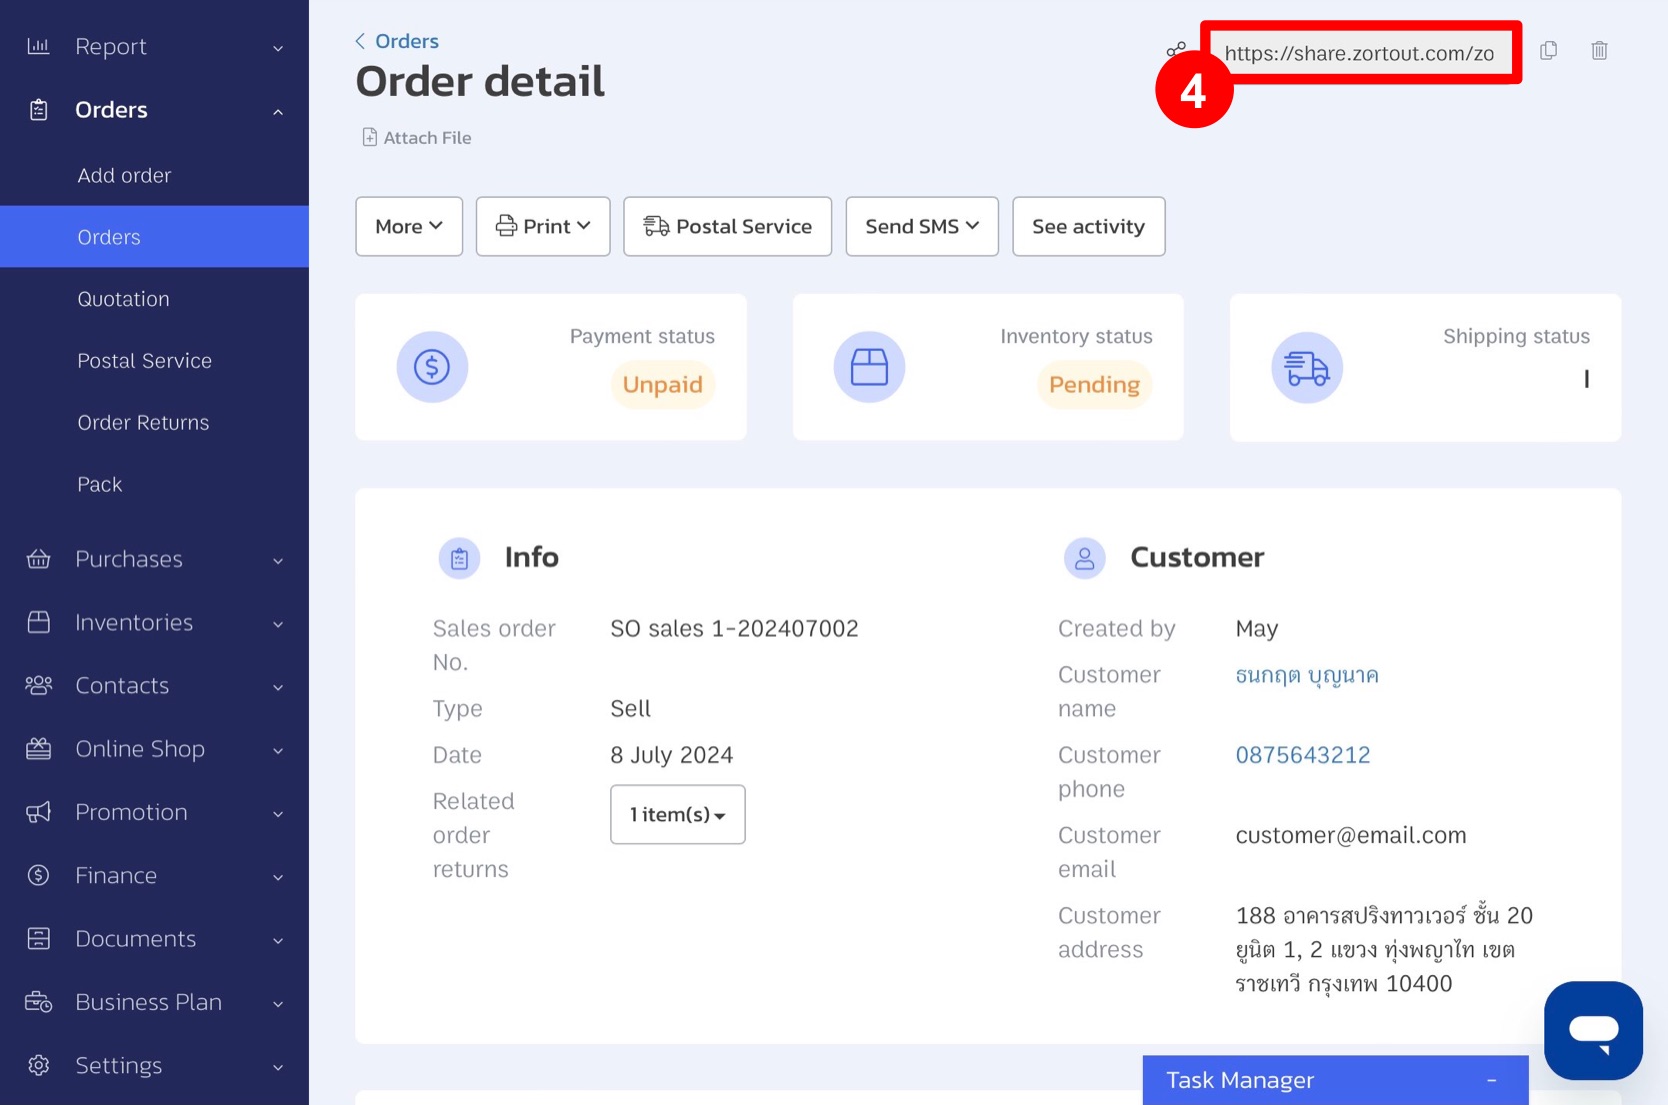
Customer Payment Example Page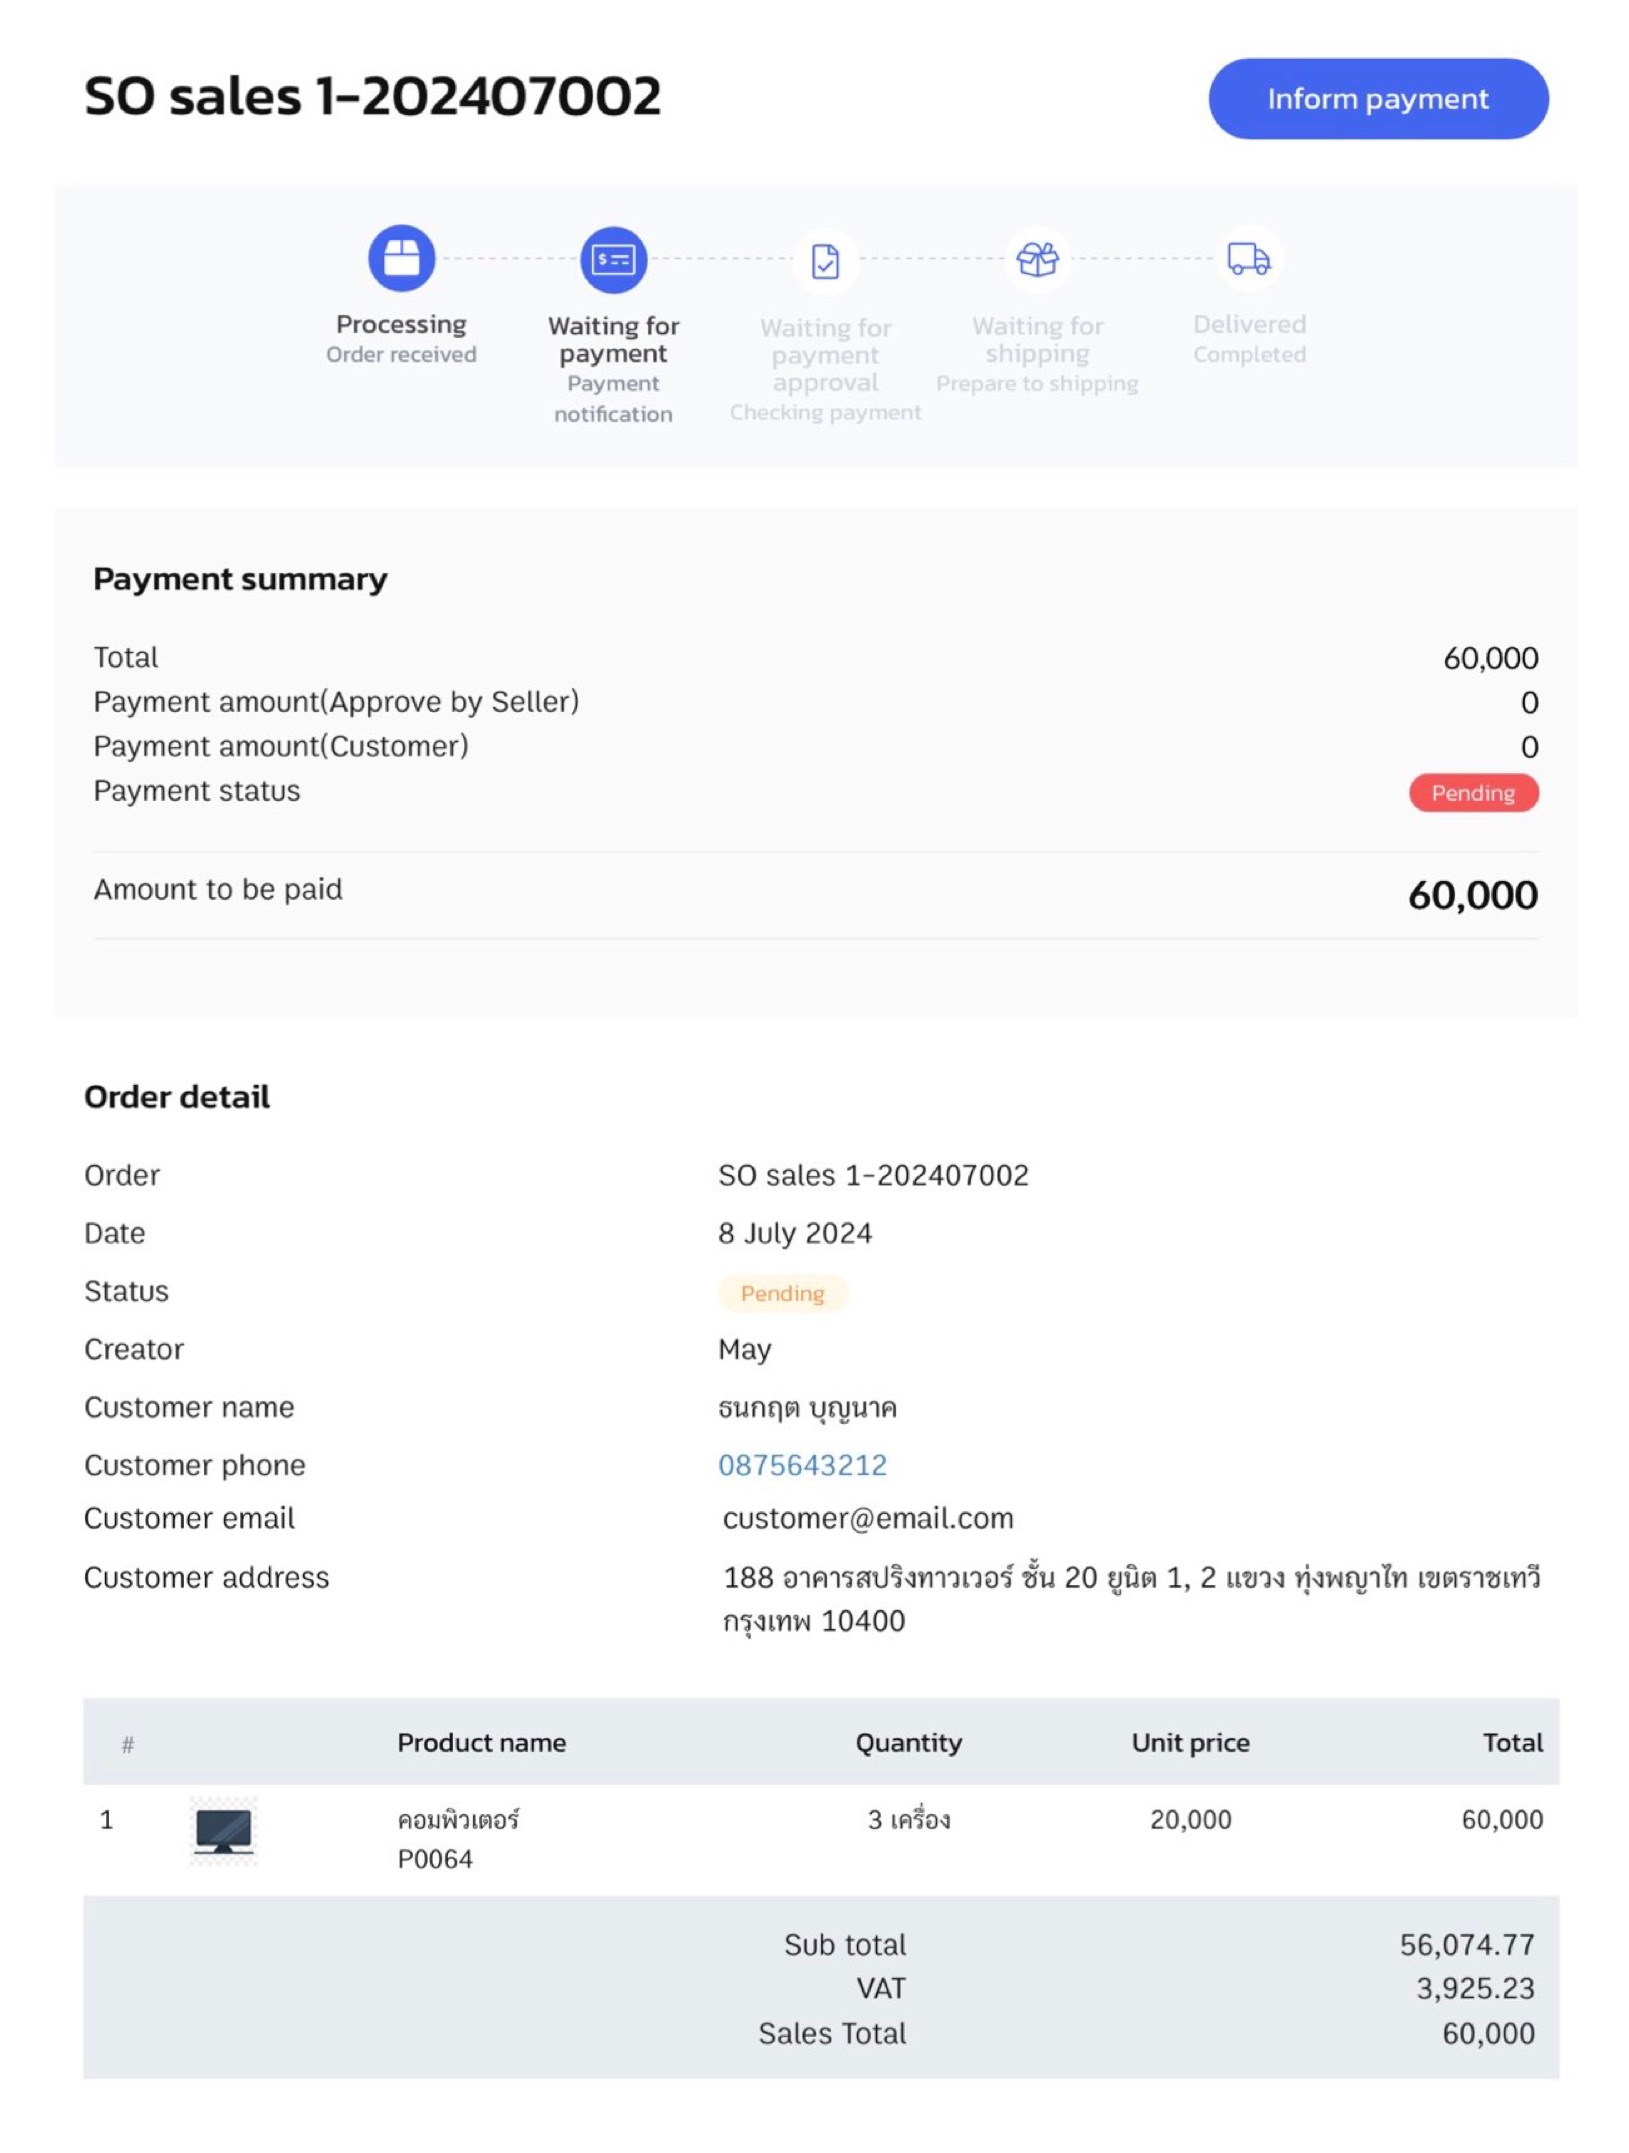
5. When the customer receives the link, they can click the payment notification button and complete the required information.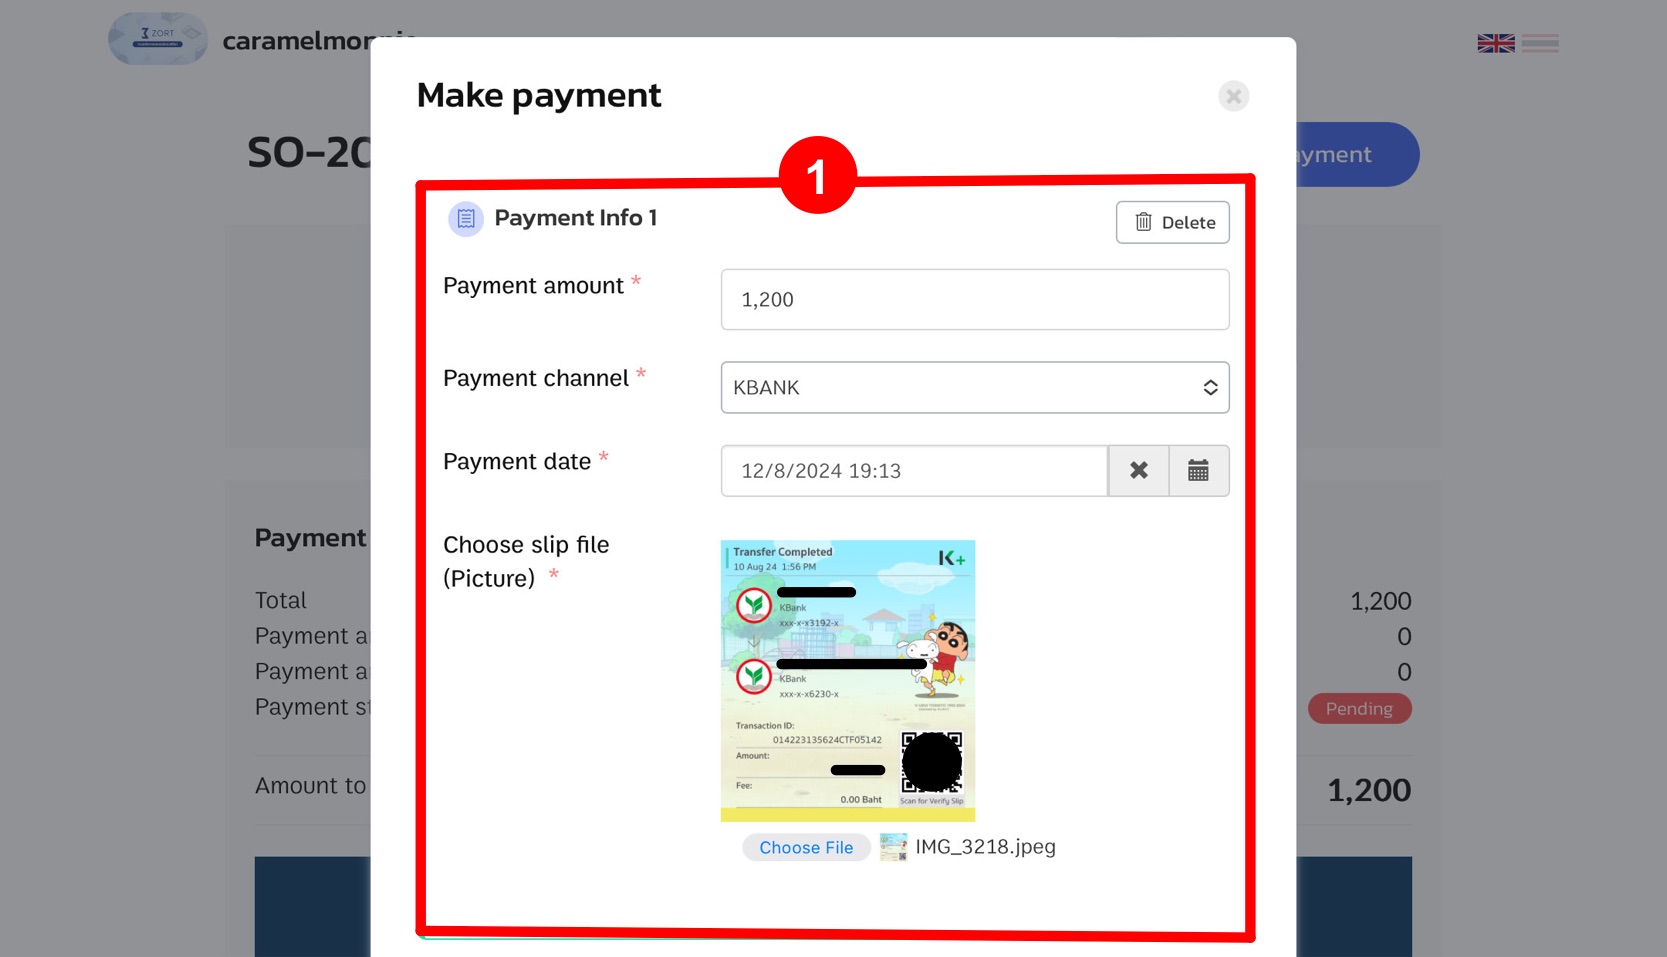
6. Once the customer has made the payment, the system will automatically verify the attached slip. The verification results are categorized as follows:
Case 1: If the slip is verified successfully, the system will automatically change the sales order status to “Paid”. The slip will be attached to the order details. Notifications will be sent via email to both the seller and the customer. (Example of notification when the slip is verified successfully.)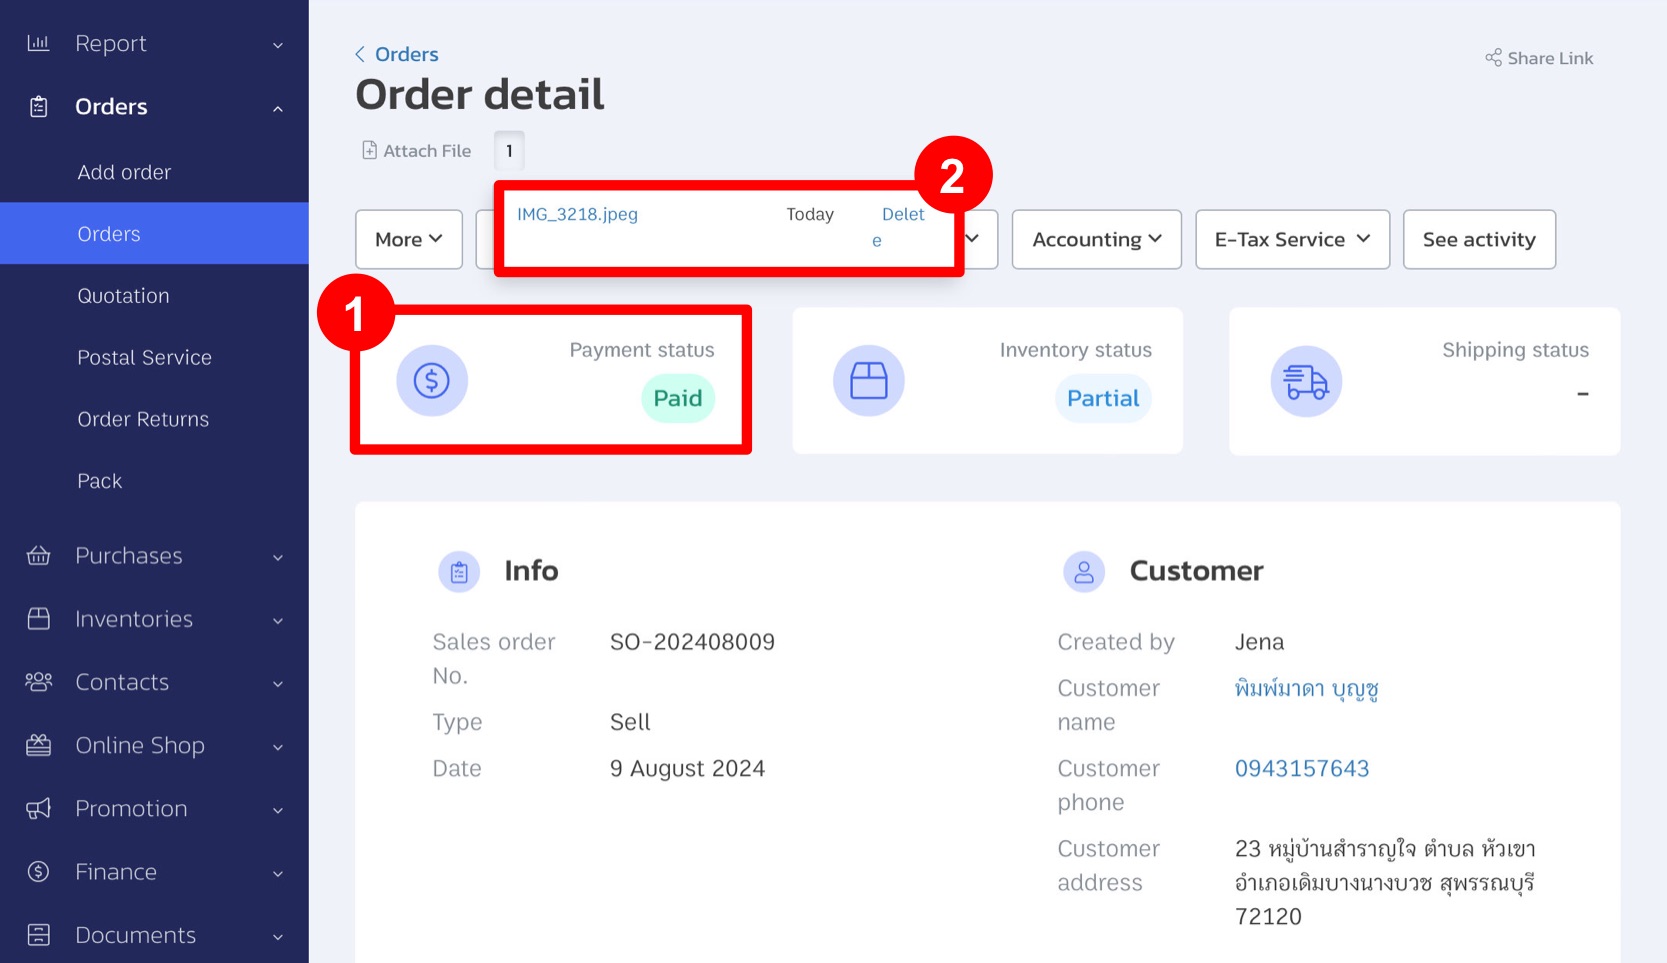
Case 2: If the slip does not display a QR Code (some banks do not include QR Codes on slips) or the QR Code is incorrect/unclear, the system will not verify the slip and no credits will be deducted.
Case 3: If the QR Code on the slip is incorrect, possibly indicating a fake slip or altered QR Code, the system will not verify the slip and no credits will be deducted.
Case 4: If the slip uploaded is a duplicate or has been previously uploaded, the system will not verify the slip and no credits will be deducted.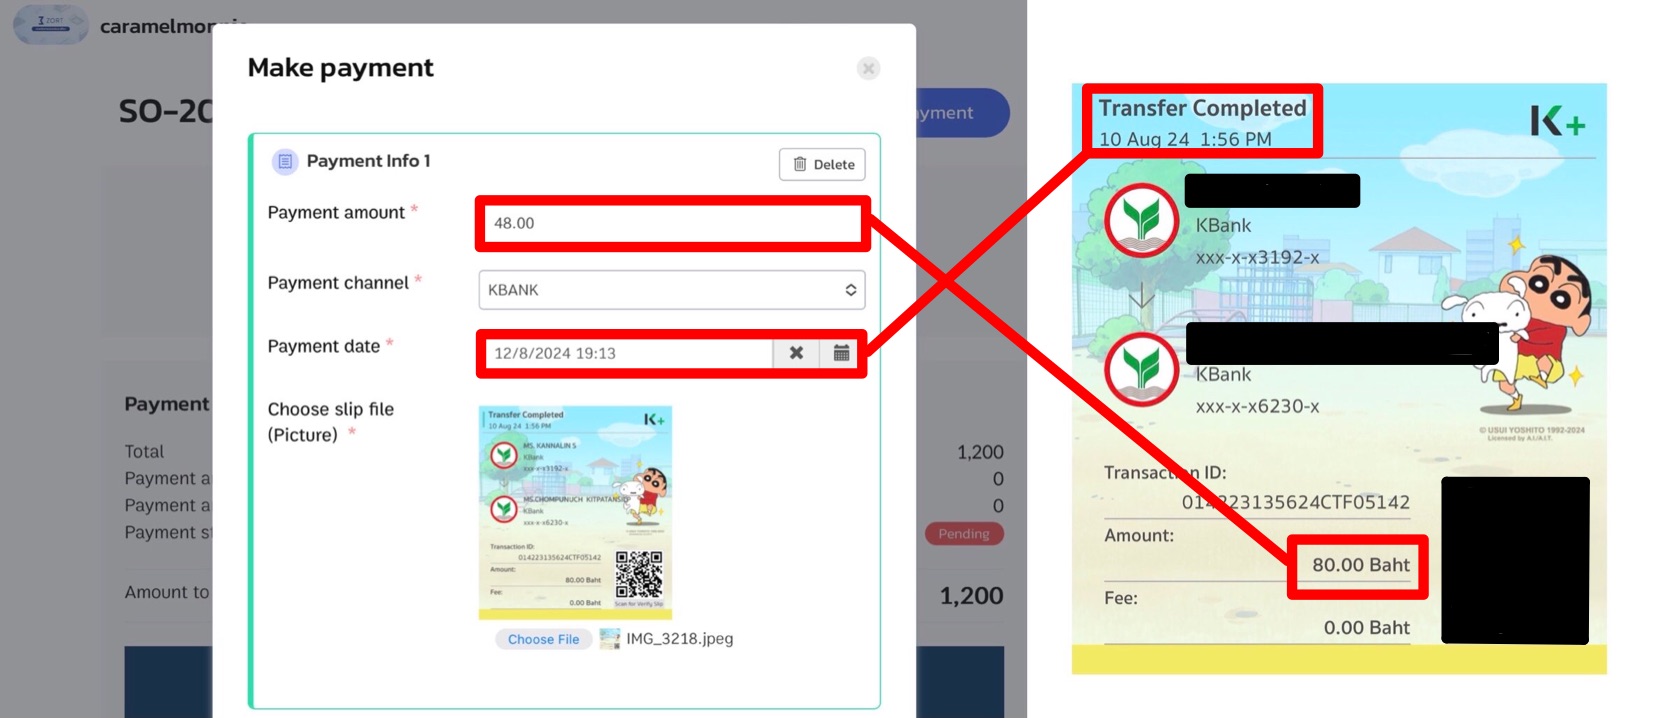
Case 5: If the payment time provided by the customer does not match the time on the slip, the system will automatically verify the slip but it will fail, and credits will be deducted. Notifications will be sent via email to both the seller and the customer.
Case 6: If the amount provided by the customer does not match the amount on the slip, the system will automatically verify the slip but it will fail, and credits will be deducted. Notifications will be sent via email to both the seller and the customer.
Case 7: If the customer selects a bank or bank account number that does not match the slip, the system will automatically verify the slip but it will fail, and credits will be deducted. Notifications will be sent via email to both the seller and the customer.
Case 8: If the slip uploaded by the customer is older than 90 days, the system will automatically verify the slip but it will fail, and credits will be deducted. Notifications will be sent via email to both the seller and the customer.
4. Notifications for Slip Verification Results
When a slip is successfully verified, the system will send an email notification to both the store and the customer.
Example of Email Notification for the Store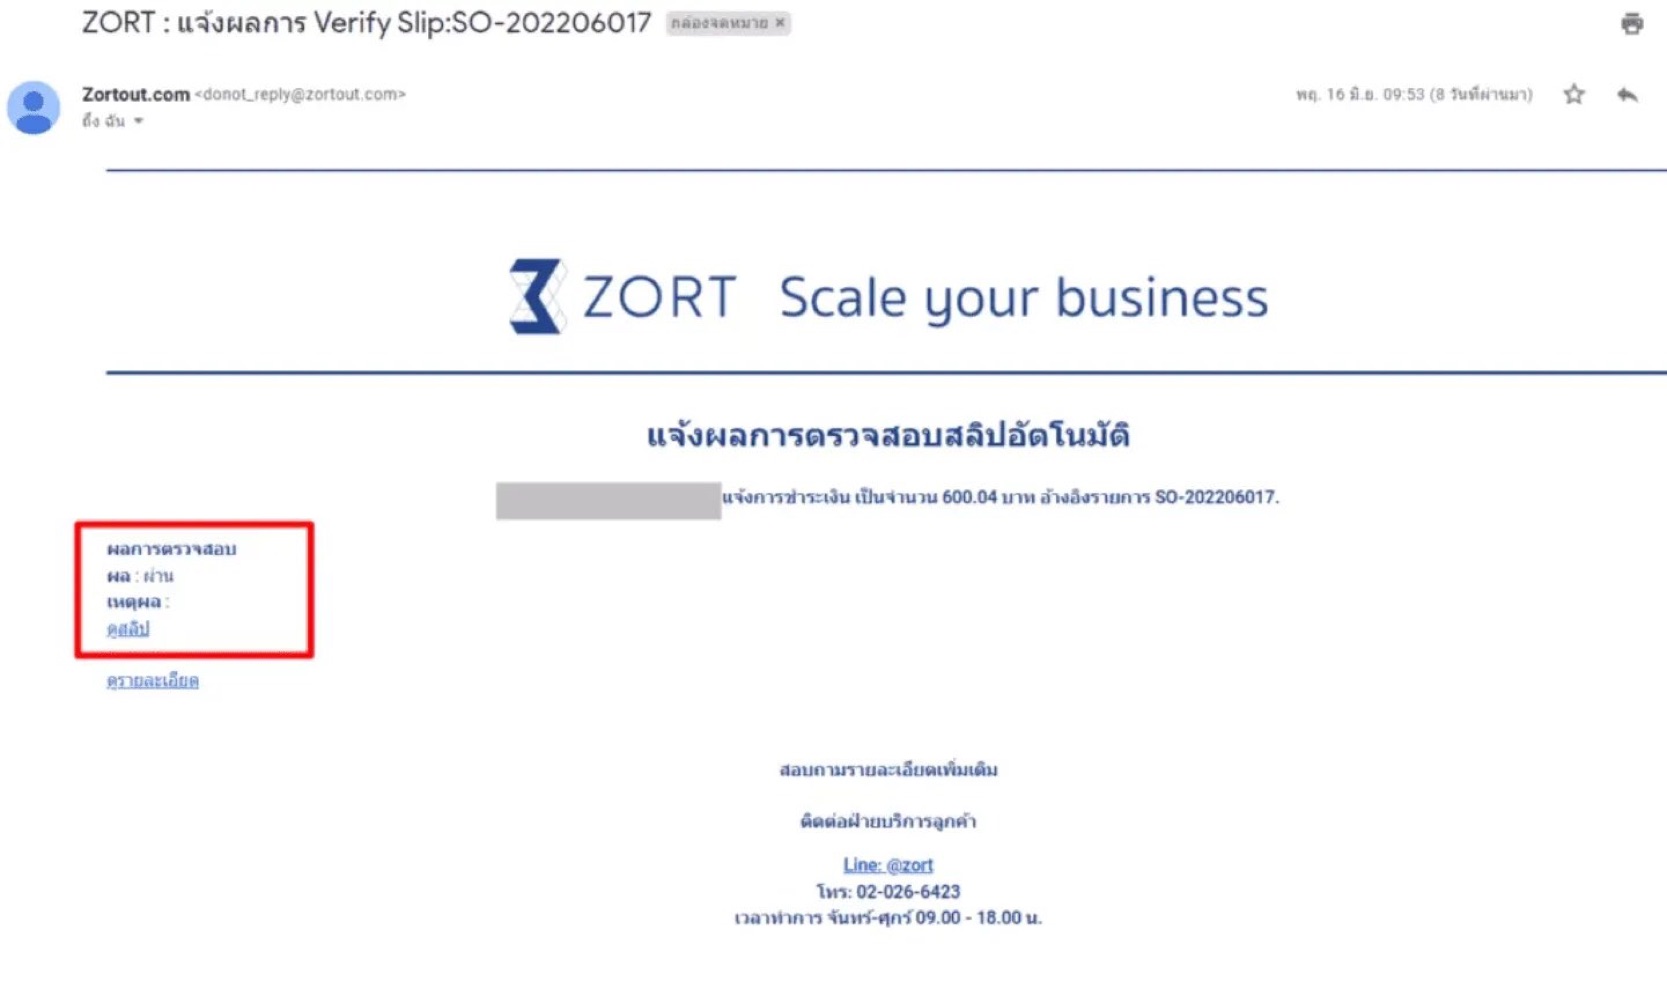
Example of Email Notification for the Customer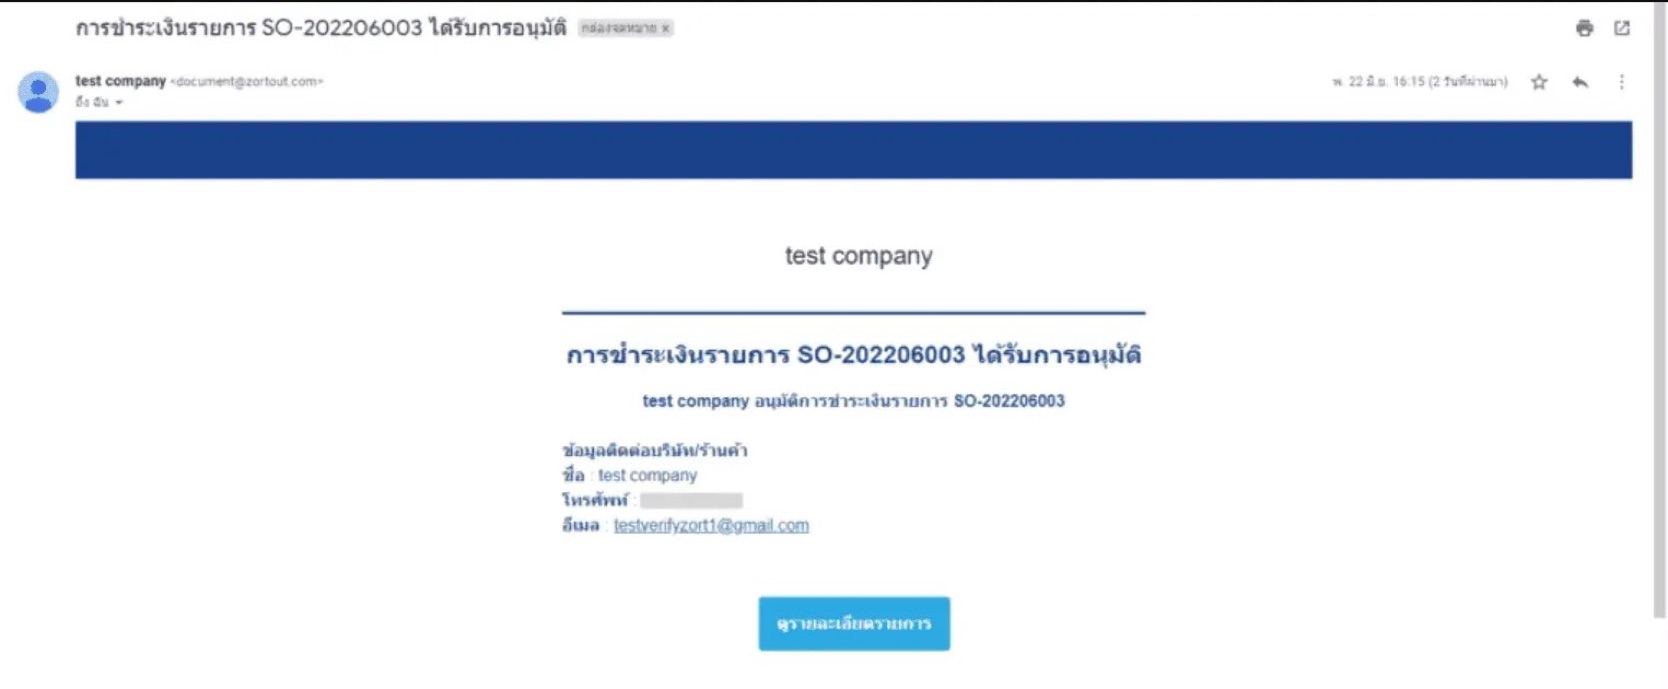
If the slip verification fails, notifications will be sent in two parts:
1. On-Screen Notification: Displayed as a money icon.
On-Screen Notification Example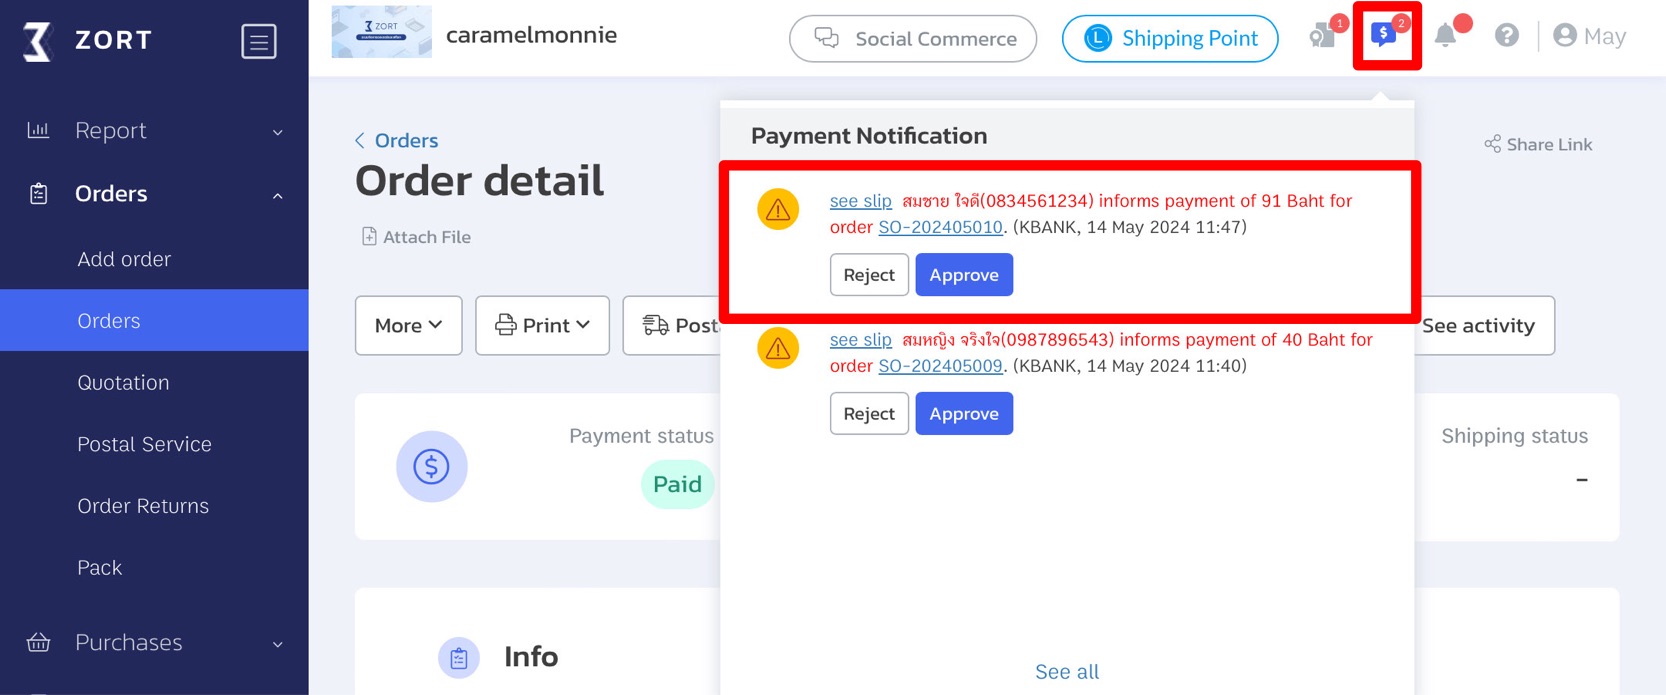
2. Email Notifications: Sent to both the store and the customer.
Email Notification Example for Failed Verification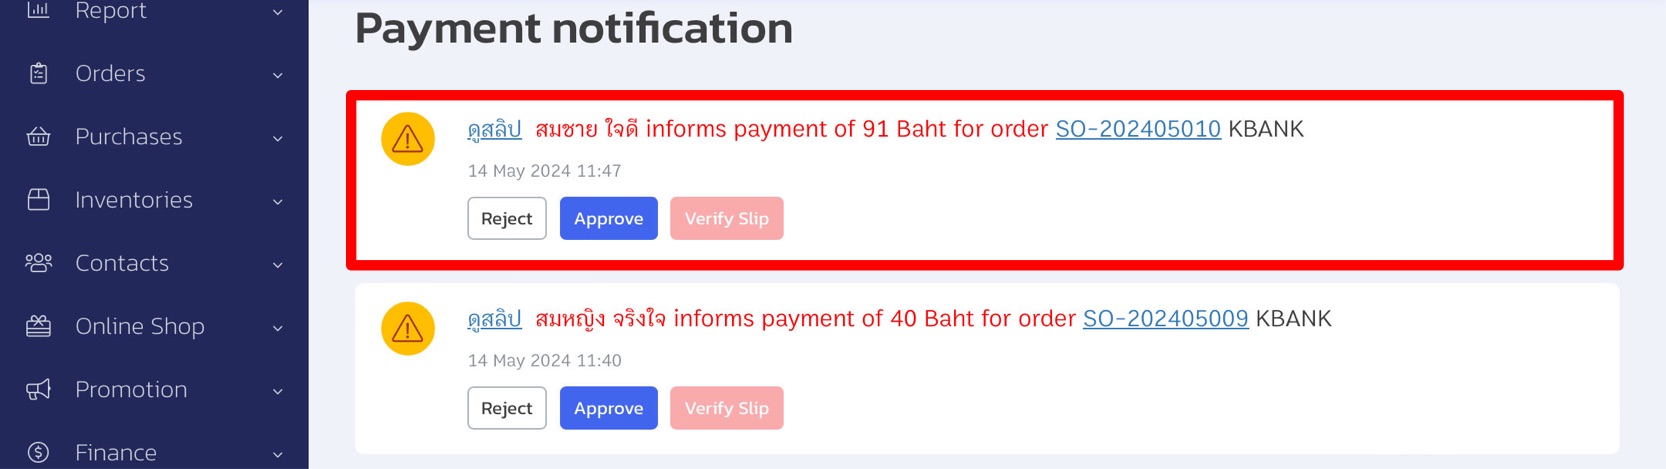
5. Viewing Verify Slip Logs in the System
1. Users can check Verify Slip logs by going to the bottom of the system page and selecting “Verify Slip Log”.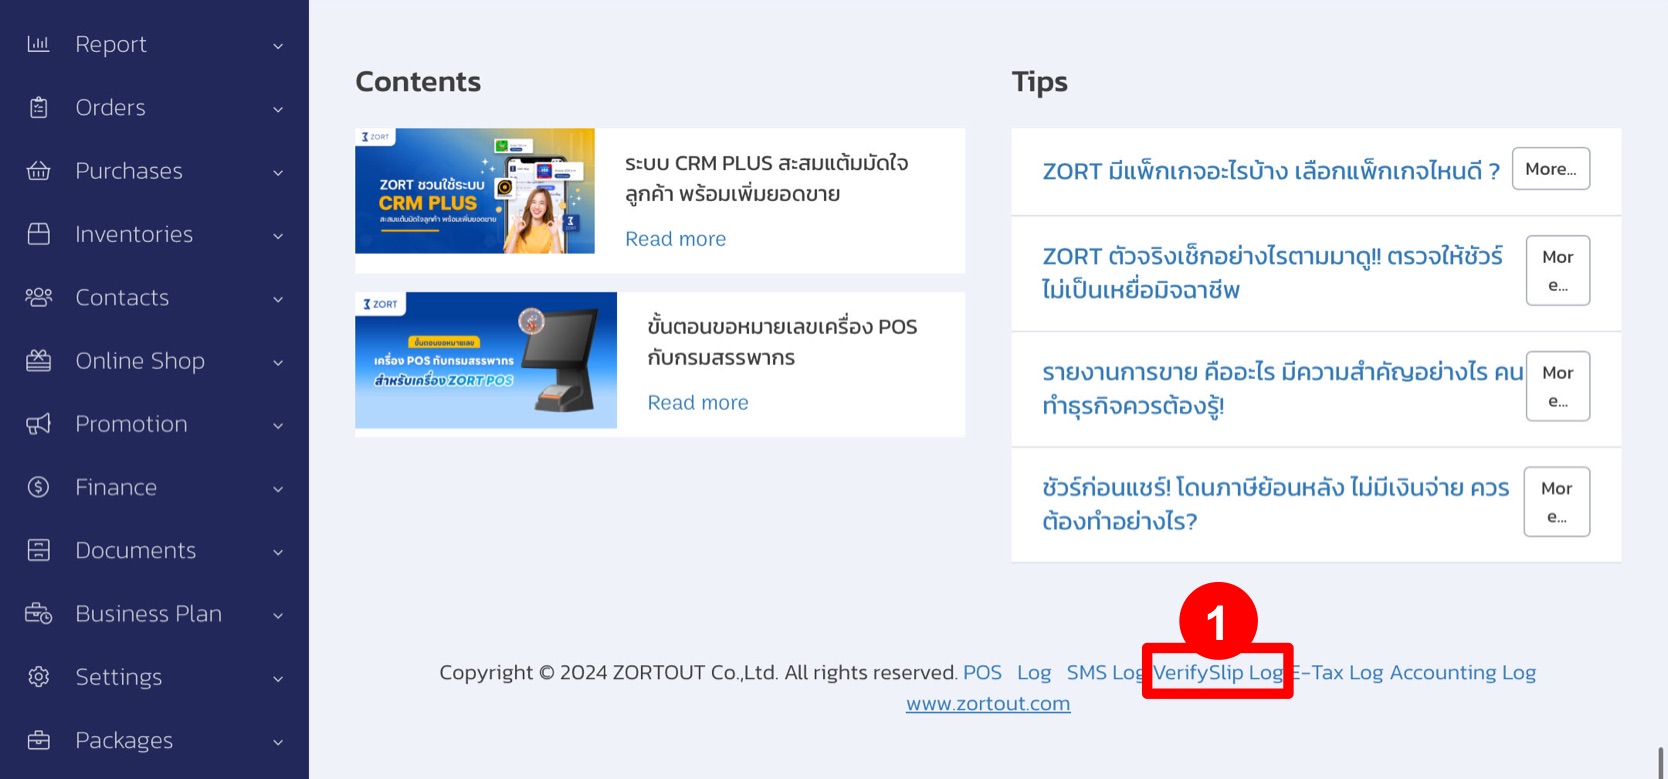
2. Click to view the Verify Slip logs from this page.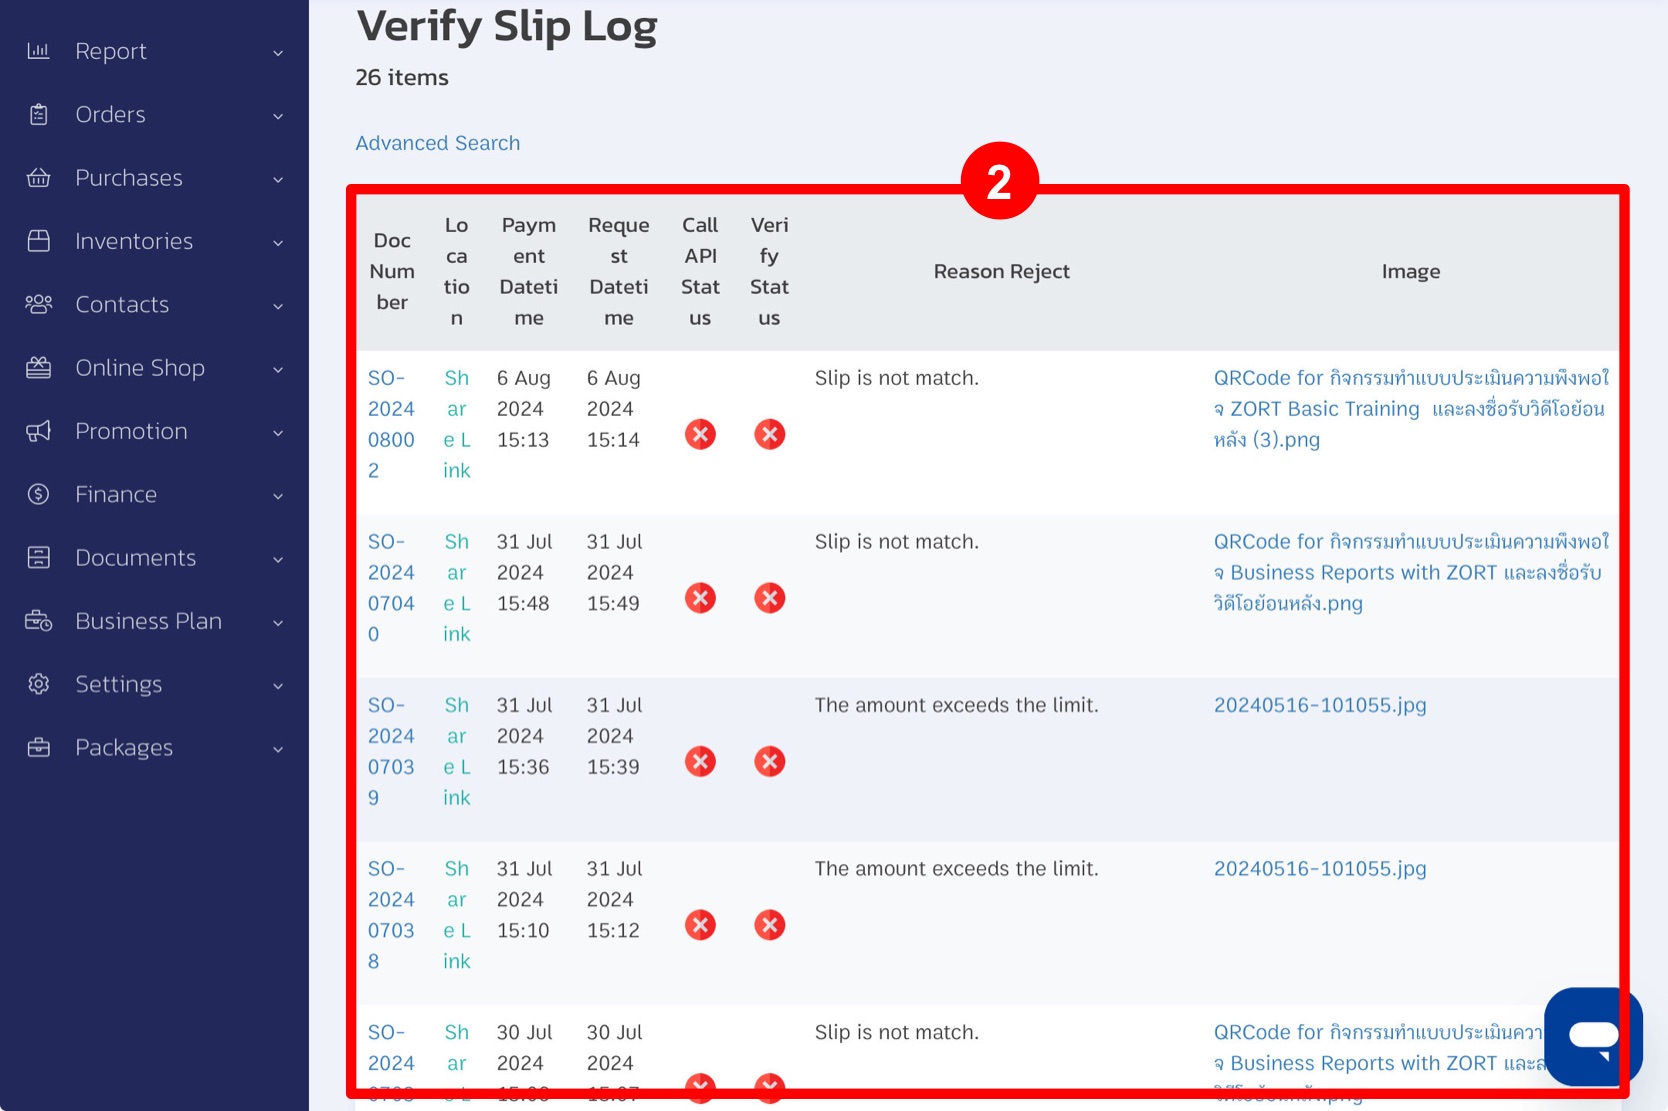
6. Retroactive Slip Verification
If the store has not added credits or set up a wallet, retroactive verification can still be performed:
1. Click on the “Money Notification” icon.
2. Click on “See All”.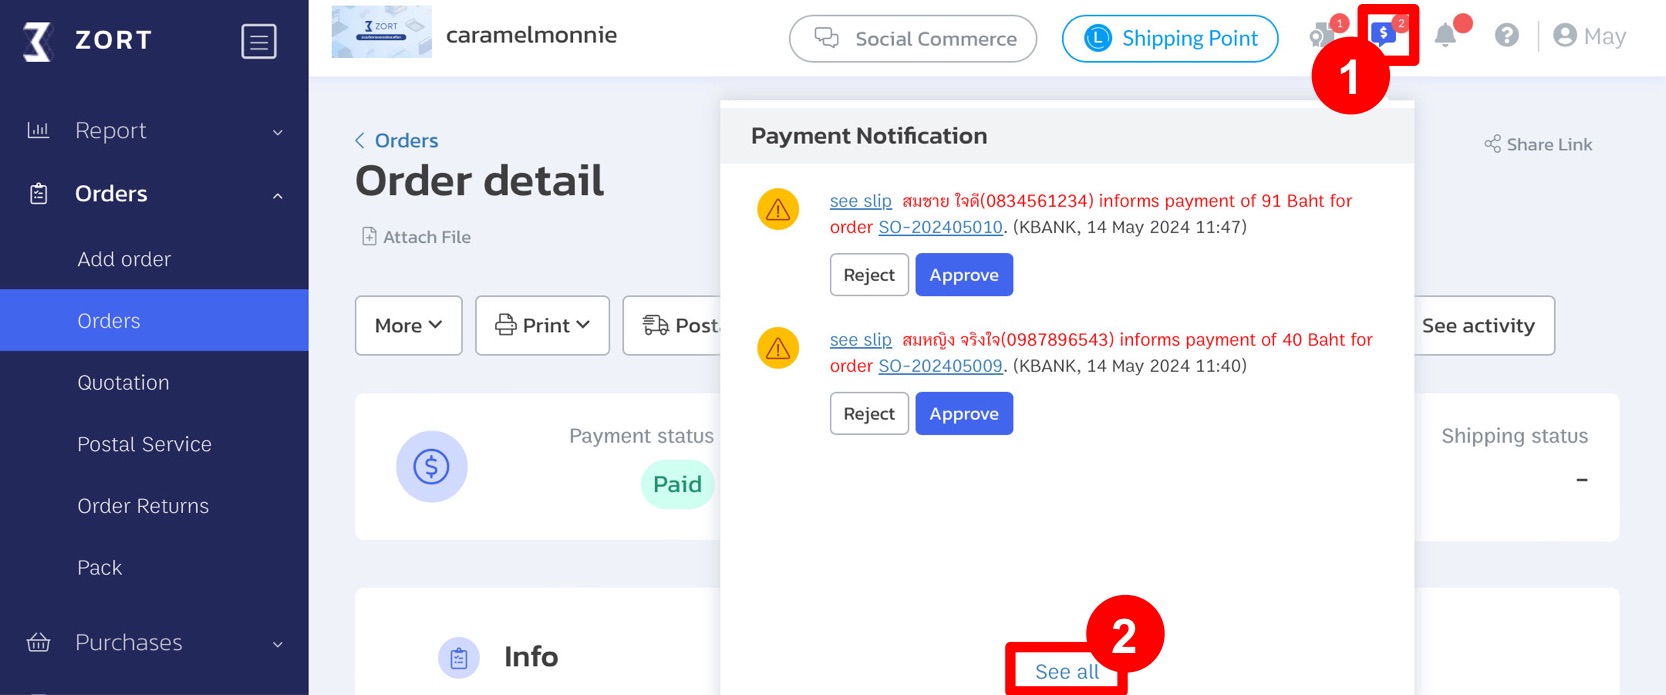
3. Click the “Verify Slip” button.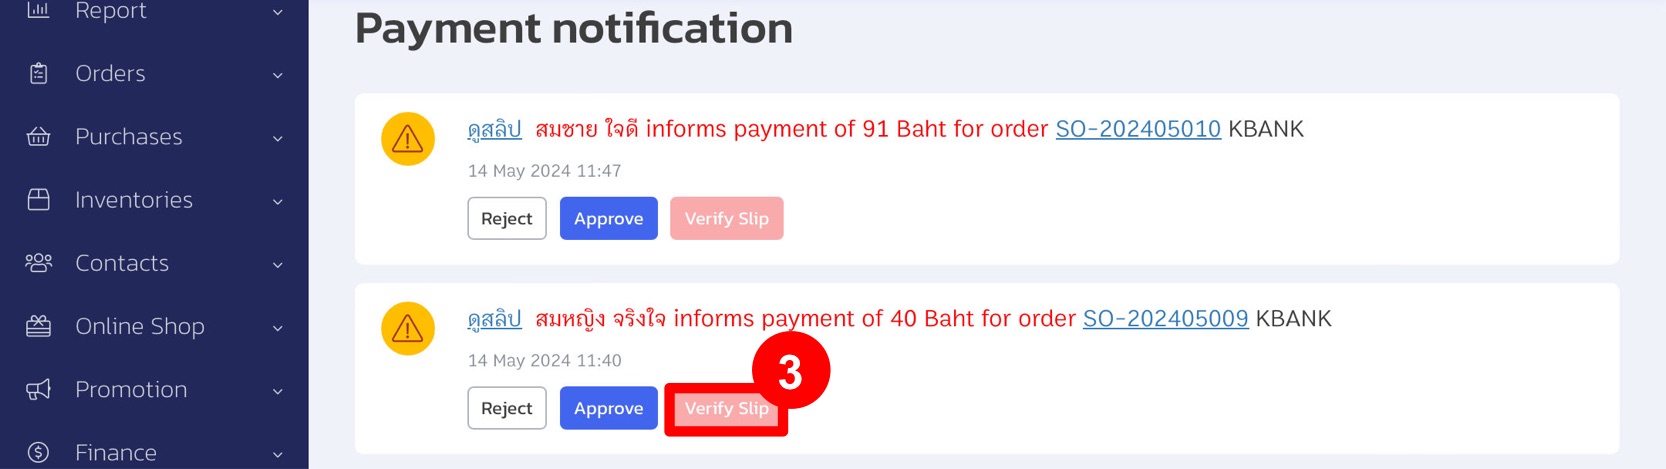
If you are interested in utilizing our comprehensive store management system,
we encourage you to reach out for further information.
Please do not hesitate to contact us at:
Phone: 02-026-6423
Email: support@zortout.com
LINE: @zort


