For businesses struggling with inventory management related to lots, expiry dates, or managing sales based on expiration dates, ZORT offers an easy solution. Here’s how you can effectively manage these aspects using ZORT:
Setting Up Product Lots
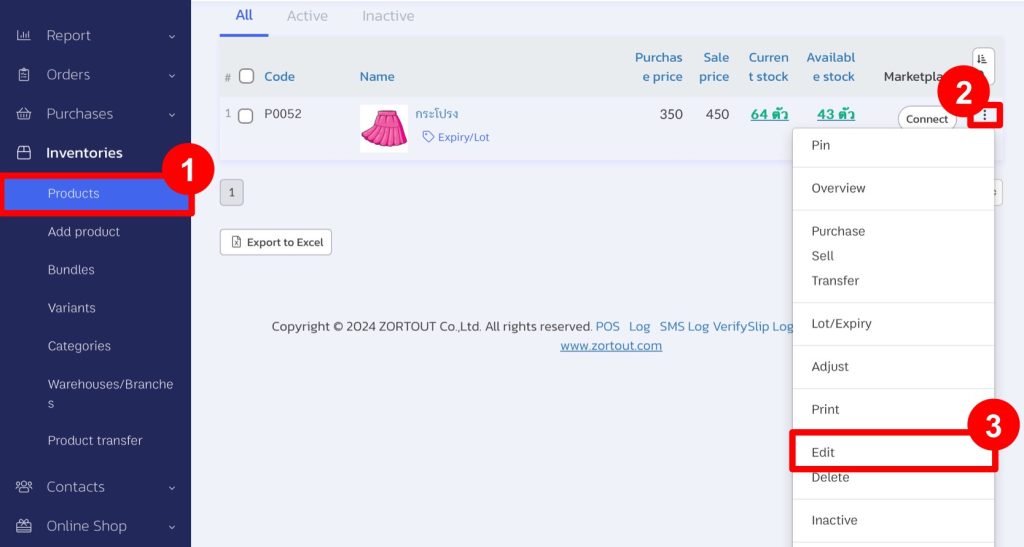
1. Go to the “Inventories” menu and select “Products”.
2. Click on the “three dots” next to the product for which you want to set up lots.
3. Select “Edit”.
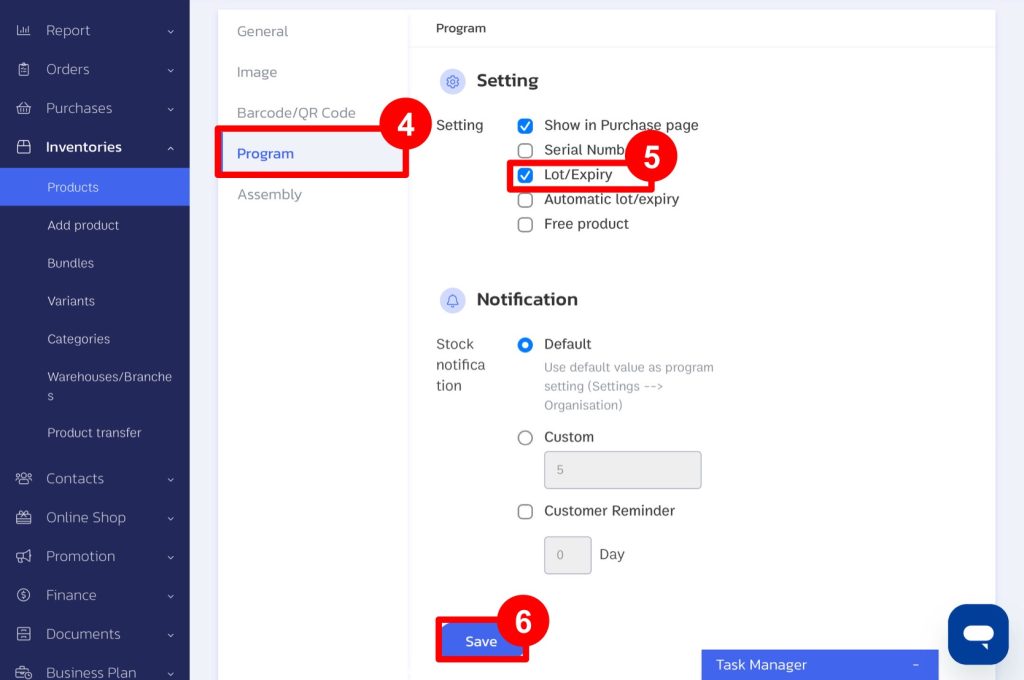
4. Go to “Program”.
5. Check the “Lot/Expiry” checkbox.
6. Click on “Save”.
This setting allows you to automatically assign lots and expiry dates each time you purchase the product, eliminating the need for repetitive setup.
Recording Purchases with Lots
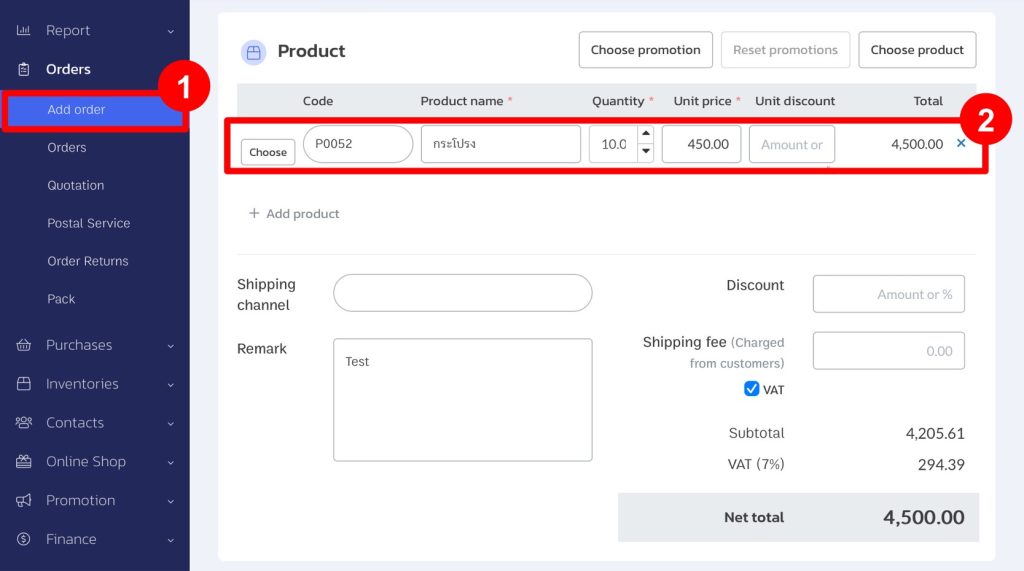
1. Go to the “Orders” menu and select “Add Order”.
2. Choose products that require lot tracking from the add order page.
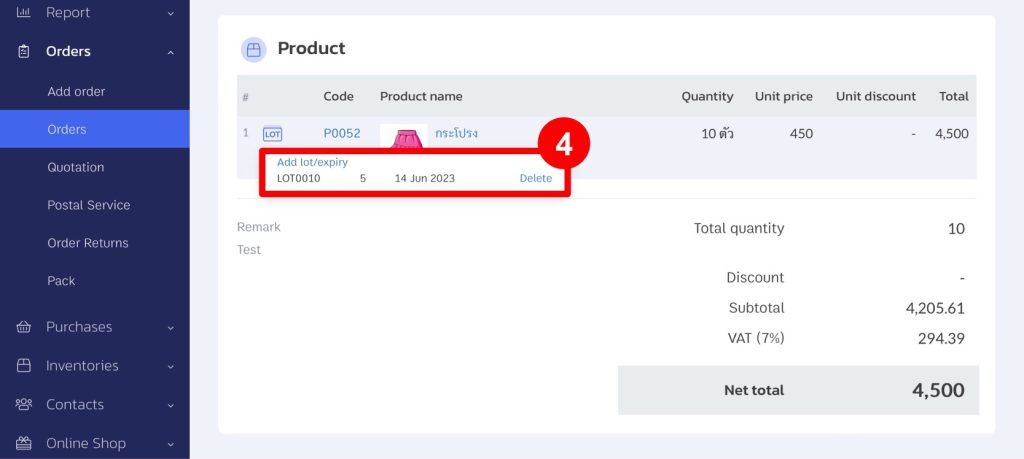
3. Upon transferring products into inventory, you can select “Add Lot/Expiry Date”.

4. Select the appropriate lot and expiry date.
*If you opt for automatic lot/expiry date assignment, lots will be added automatically upon data transfer.
Setting Up Near-Expiry Sales
1. Go to the “Settings” menu and select “Organization”.
2. Select “Program”.
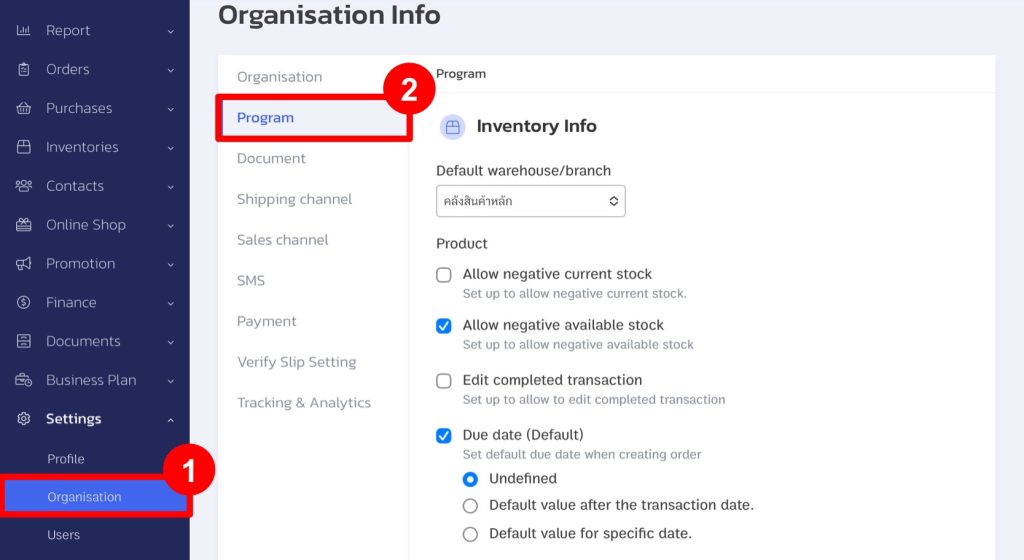
3. Check “Automatic lot” when selling products.
4. Click on “Save”.
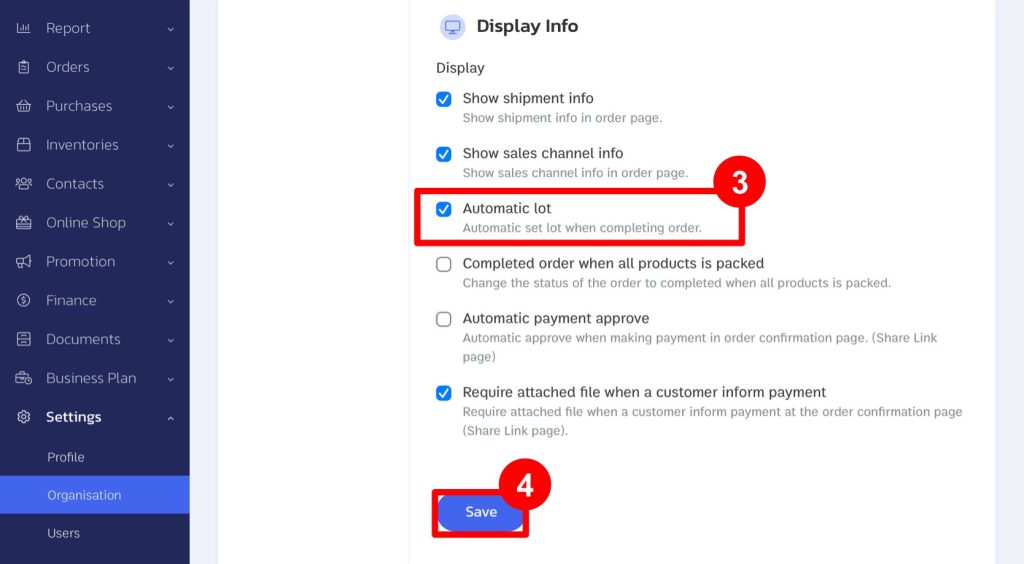
After setting this up, when selling products and transferring them out of inventory, products nearing expiry (but not yet expired) will be deducted first from stock.
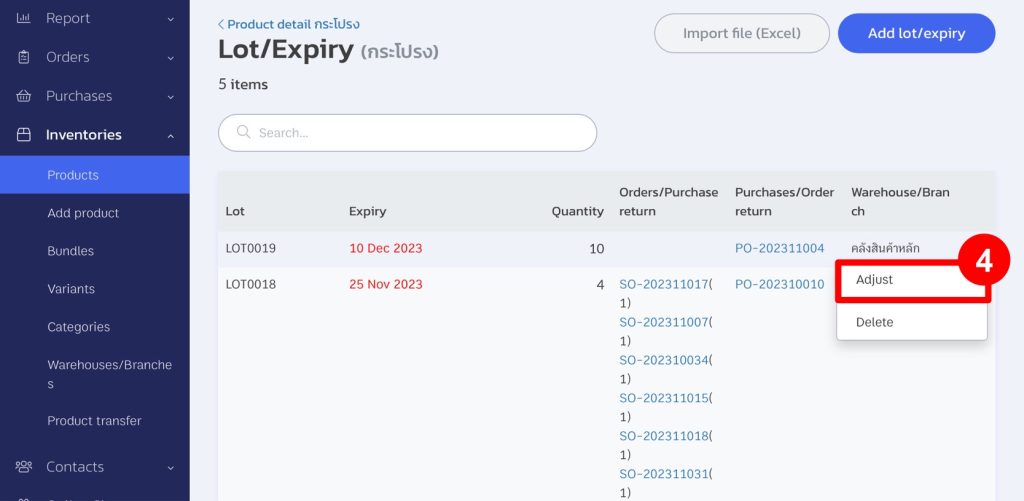
Adjusting Stock for Expired Products
1. Go to the “Inventories” menu and select “Products”.
2. Select the “three dots”.
3. Choose “Lot/Expiry”.

4. Select the “three dots” next to the product for which you need to adjust quantities, then click on “Adjust”.
If you are interested in utilizing our comprehensive store management system,
we encourage you to reach out for further information.
Please do not hesitate to contact us at:
Phone: 02-026-6423
Email: support@zortout.com
LINE: @zort


